Showing posts with label Chile. Show all posts

Monday, September 24, 2012

Mexican Quinoa & Pintos Stuffed Poblanos

I LOVE poblano peppers. They're mild and delicious and I could eat them in everything!

I made Mexican Quinoa & Pintos with the intent to stuff poblanos with it... and I'm SO glad I did!!


Mexican Quinoa & Pintos Stuffed Poblanos
1 recipe Mexican Quinoa & Pintos
3 poblano peppers
1 1/2 C red enchilada sauce
3/4 C shredded colby pepperjack cheese

Cut the tops out of the poblanos and discard the seeds.
Stuff peppers with quinoa. Cover with enchilada sauce.
Cover pan loosely with foil.
Bake in oven preheated to 350F for one hour or until peppers are fork tender.
Top each pepper with 1/4 cup of shredded cheese and bake 5 more minutes or until cheese is melted.
Enjoy!

~~~~~~~~~~~~~~~~~~~~~~~~~~~~~

So start by cutting out the tops of the poblanos and discarding the seeds.


Then stuff the peppers with Mexican Quinoa & Pintos


Pour enchilada sauce over stuffed poblanos.


Cover pan loosely with foil and bake at 350F for one hour or until peppers are fork tender. (you can see my little stabby fork marks)


Mmmmm... this smells so good!!

Sprinkle with shredded cheese and bake 5 more minutes or until cheese is melty.


Time to enjoy!


These were so tender and tasty! Tawny and I each had one and really liked them. I sent one across the street to Erin too and deemed it blogworthy!

So there you have it!

Wednesday, July 18, 2012

Jalapeno Popper Grilled Cheese Sandwich

Jalapeno Popper Grilled Cheese Sandwiches!

As soon as I saw them I knew I had to make them! And I saw them a lot!! They were all over the interwebs!

Anyway... these are amazing... but if you're watching what you eat, save this one for a day when you have a little wiggle room... ok, a lot of wiggle room, because this is definitely an indulgence!

IMG_0656

Jalapeno Popper Grilled Cheese Sandwich

sourdough bread
softened cream cheese (about 2 TBLS per sammie)
shredded cheddar cheese
shredded jack cheese
sliced jalapeno peppers, sliced lengthwise
tortilla chips, roughly crushed
butter

First for the jalapenos. You can use either canned jalapenos (not the little pickled slices) or fresh. If you use fresh, char the peppers on the outside using your broiler or grill. Turn until all side are blackened (about 10 minutes more or less) Immediately place them into a sealed container. Let them rest for 10 to 20 minutes. Now the skins should slip off easily.

Butter one side of each piece of bread.

Place one slice of bread, buttered side down in skillet over medium lowish heat.

Top with shredded cheddar and jack cheeses.

Add crushed tortilla chips.

Top tortilla chips with jalapeno slices.

Spread cream cheese on plain side of remaining slice of bread and place it on top of sandwich with buttered side up.

Cook on medium lowish heat until golden brown. Then carefully flip sandwich.

Continue cooking until cheese is melty and bread is golden brown.

Enjoy!

~~~~~~~~~~~~~~~~~~~~~~~~~~~~~

Ok... here's what you need...
IMG_0649

Buttered side down, topped with cheddar cheese...
IMG_0650

Then jack cheese... mmmm... so creamy and melty!!
IMG_0651

Next you really should put on the tortilla chips... however I put on the jalapenos.
IMG_0652

Ah... now there's nothing for the chips to kinda stick to... so I put the cream cheese on the other slice of bread and kinda stuck them on there...
IMG_0654

Then I had to flip that onto the rest of the sandwich without losing my chips! But I totally got lucky have mad skillz... so it totally worked out...
IMG_0655

Carefully flip it and continue cooking until the cheese is melty and the bread is golden.

IMG_0657

These are wicked good! Gooey, cheesy, melty, spicy... YUM!!

You'll want to control the heat in your sandwich to your liking. Some of family thought they were a little too spicy... some thought they were just fine. Instead of the slices... you might even want to dice the jalapenos. Then you can really control just how much you have in there. I couldn't really pick out the flavor of the tortilla chips, as the crunchy coating on a jalapeno popper. Maybe I needed more? I'm not sure. But it definitely didn't ruin overall jalapeno popperness of the sammie.

I loved these... and I have no idea why I haven't made them again, because these pictures are pretty old!

If you love grilled cheese sandwiches and jalapeno poppers, you must put these on your short list of things to make!

Wednesday, July 11, 2012

Foolproof Mexican Rice

Let me start by saying I'm usually awful at making rice from scratch.

When I make Mexican/TexMex, I usually make rice from a box mix. Jon's not a huge fan of those, but I really do like them.

I'd made Mexican Rice once before from scratch and it was tasty, but since I've never made it again, I guess not so memorable.

I was watching Marcella Valladolid's Mexican Made Easy one day and she made Arroz Mexicano. It looked so easy! I found her recipe online and gave it a try.

Photobucket

Foolproof Mexican Rice
3 vine-ripened tomatoes (or one 15 oz can whole tomatoes)
2 cups chicken broth, plus more as needed
1 tablespoon olive oil
1 large chopped onion
1 large finely diced carrot
1 large garlic clove, minced
2 cups medium-grain rice
2 teaspoons salt
1 bay leaf
1 whole serrano chile
2 TBLS tomato paste
1/4 cup fresh or frozen peas, thawed

Cut the tomatoes in half, and remove the seeds. If using canned, just put them in the blender.
Add the tomatoes and 2 cups of broth to a blender and puree.
Strain into a bowl and reserve the liquid.
Add enough extra broth to make 4 cups of liquid.

In a large saucepan, heat the oil over medium-high heat.
Add the onion and carrots and saute for 4 minutes until the onion is translucent.
Add the garlic and saute for 1 minute.
Stir in the rice and cook until slightly toasted, about 3 minutes.
Add the tomato broth mixture, stir and bring to boil.
Add the salt, bay leaf, tomato paste and the serrano chile.
Reduce the heat, cover and simmer until the rice is tender, about 20 minutes.
Remove the pan from heat.
Scatter the peas over the top of the rice, cover, and let the rice stand 5 minutes.
Fluff the rice with a fork, transfer to a serving bowl and serve.

~~~~~~~~~~~~~~~~~~~~~~~~~~

I start by prepping the tomatoes.

When I don't have fresh tomatoes, I just use a 15 oz can of whole tomatoes and pour the whole thing into the blender.

But I had some this time.
Photobucket

Then blend with 2 cups of chicken broth, sometimes I use veggie broth.
Photobucket

And strain that into a 4 cup measuring cup.
IMG_9879

Top it up to 4 cups with more broth.

Now... onions and carrots into the pot with oil.
Photobucket

After about 4 minutes, add the garlic and saute for about a minute.

Then add the rice and cook a few minutes, until a little toasted
IMG_9882

Add the tomato broth mixture and stir and cook until boiling.

Then add salt, tomato paste, bay leaf and serrano pepper.
Photobucket

Cover and simmer until the rice is tender. Remove from heat.
Photobucket

Sprinkle the peas in and cover the pan and let rest 5 minutes.
Photobucket

Fluff with fork and it's ready to serve!
Photobucket

A perfect side dish!!
IMG_9888

This rice is wicked easy and wicked good!!

It's mildly flavored and really goes well with everything. It's definitely Jon's favorite. Bobby loves it too. And even though I do still like my Rice-a-Roni... I really LOVE this rice!!! It takes no longer to make than the prepackaged stuff and is just so much better!!

Photobucket

And... it means I don't suck at making rice anymore!!!!

Friday, June 19, 2009

Baked Chicken Chimichangas

Normally if I'm making Chimichangas, I'd be using my Smoky Mexican Chicken and it would definitely be fried.

But I'm still trying to keeps things light at my house, so while the Smoky Mexican Chicken would definitely fit the bill... the frying definitely would not.

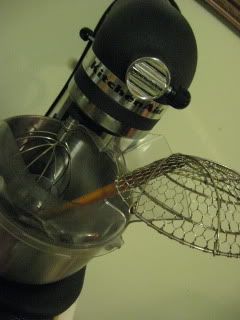
I think my spider cried a little... he's just been standing around in my Kitchenaid just waiting for the opportunity to dip into some hot oil and scoop out some yummy fried morsels.
Photobucket

Not to worry, I'm not giving up frying, just frying a little less. But last night, there was no hot oil action for spider.

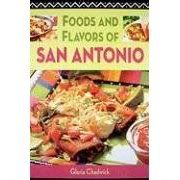
I've been talking about my new favorite cookbook Foods and Flavors of San Antonio. Right away I decided to make the Chicken Chimichangas found on page 16. I also knew I'd try baking them. I refuse to give up taste or texture for a healthier dish, so I had my fingers crossed that baking would ruin them. And it DEFINITELY didn't!
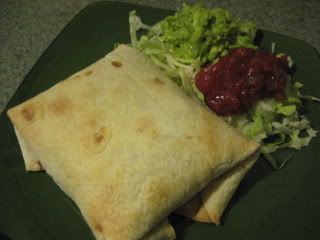
Photobucket

I changed the recipe slightly because I couldn't find any canned tomatillos and the refresh one looked decidedly less than fresh! My changes are in green.

Baked Chicken Chimichangas
2 lbs skinless chicken breast
1 dried chipotle chile
1/2 C onion, chopped (I used less onion, since I replaced the tomatillos with tomatillo salsa)
4 cloves garlic, chopped
1 tsp cumin (more cumin, because I really like it!)
1/2 tsp coriander
1/2 tsp cinnamon
1/2 tsp cloves
16 oz tomatillo salsa (couldn't find decent tomatillos)
2 15.5oz cans pinto beans, drained & rinsed
salt & pepper to taste
8 10in flour tortillas

Optional but suggested garnishes: lettuce, salsa, guacamole

Place chicken breasts and dried chipotle chile in a large sauce pan add water until covered.

Cook 15 - 20 minutes, until chicken is cooked through. Shred chicken with forks and set aside.

Preheat oven to 450F.

Remove seeds from chipotle and dice chile.

In a large non-stick skillet, coated with cooking spray, saute onion, garlic and chipotle until tender. Add tomatillo salsa, cumin, coriander, cinnamon and cloves. Simmer 3 minutes. Add beans and shredded chicken. Cook until heated through.

Wrap flour tortillas in a slightly damp towel and microwave for 30 seconds, until pliable.

Place 3/4 cup chicken mixture in the center of a flour tortilla, fold sides in, then fold in top and bottom.

Place on a baking sheet coated in cooking spray. Repeat with remaining filling and tortillas.

Lightly spray tortillas with cooking spray. Bake 15 - 20 minutes or until golden and crispy.

Garnish with lettuce, salsa and guacamole.

Guacamole instead of sour cream... good fat instead of bad fat... plus it's a veggie!

~~~~~~~~~~~~~~~~~~~~~~

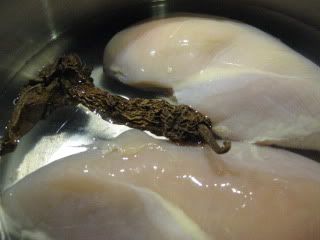
Throw the chicken in a pot with a dried chipotle or two, cover with water and 15 - 20 minutes until chicken is cooked through.
Photobucket

This was nice. The chicken had a really mild chipotle spicy flavor when it was cooked.

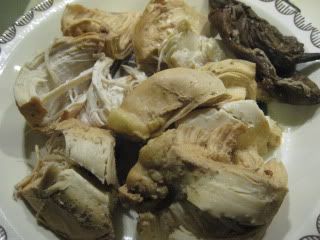
Shred the chicken with forks (or your hands if it's cooled enough)
Photobucket

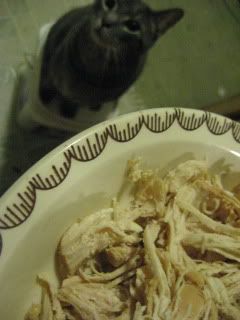
This time General Prang is interested in what I'm doing at the counter.
Photobucket

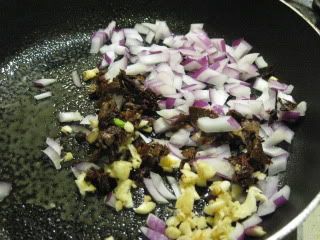
Saute the onions, garlic and chipotle until tender.
Photobucket

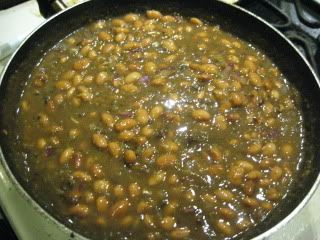
Add tomatillo salsa, beans & spices and cook a few minutes until they're heated through.
Photobucket

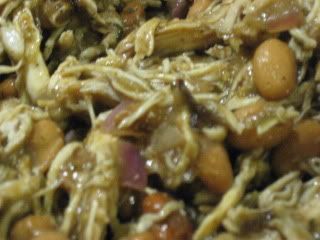
Then add the shredded chicken.
Photobucket

This smells amazing!! My recipe would typically smell like taco meat. But the addition of coriander, cinnamon and cloves gave it a completely different aroma. It kind of reminded me of mole.

Mmmmmm.... doesn't that look good?
Photobucket

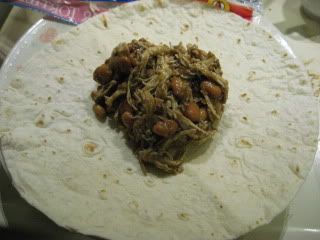
Now put 3/4 cup of chicken mixture into the center of each tortilla. (one at a time, unless you have a gigantic counter)
Photobucket

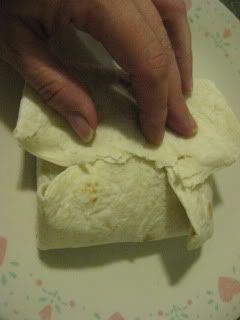
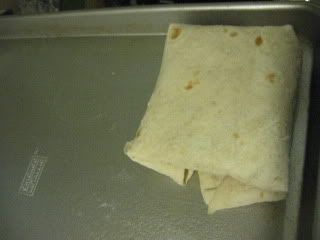
Now normally I'd roll this like a burrito. Definitely not an easy shape to fry. The instruction in the recipe said to fold the sides in, then fold up the top and bottom. You end up with a little pocket shape.
Photobucket

Here's where I veer away from the recipe. Instead of frying these, they get baked. (sorry spider... don't worry, there are still Deep Fried Candy Bars, Lumpia & Chicken Wings in your future!

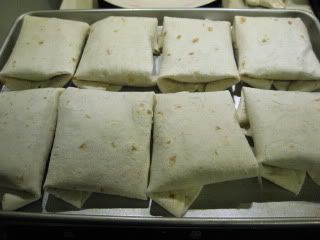
Place the yummy little chicken packet on a baking sheet coated with cooking spray.
Photobucket

Repeat with remaining filling and tortillas.
Photobucket

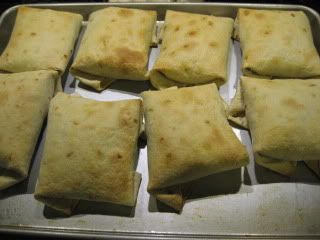
Give them a light spray with cooking spray and pop them into an oven preheated to 450F. Bake 15 - 20 minutes or until golden and crispy.
Photobucket

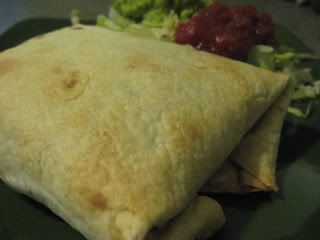
I garnished them with shredded lettuce, salsa and guacamole
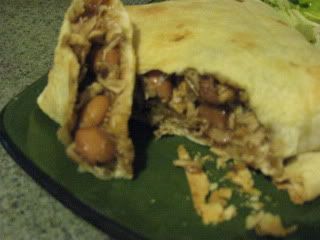
Photobucket

Photobucket

Photobucket

I spread the lettuce, salsa & guacamole on top before I started to eat it and it really had a restaurant flavor/feel to it.

Jon and Lilly and I really loved these. Tawny wasn't a big fan. So I asked if she liked my Spicy Empanadas. She said, "NO!! That's what these remind me of!"

If you like the empanadas, you will love these!

How did these fare compared to their full fat deep fried relatives?

Definitely two enthusiastic thumbs up!

Nutritional Info per serving (one chimichanga):

Calories: 468.2
Total Fat: 7.1 g
Cholesterol: 65.7 mg
Sodium: 1,322.5 mg
Total Carbs: 61.5 g
Dietary Fiber: 8.3 g
Protein: 38.7 g

Adding 2 TBLS of my homemade guacamole.
Calories: 44
Fat: 4 g
Carbs: 2 g
Fiber: 1 g
Protein: <1 g

Still a healthy low fat completely delicious meal!

We have 4 left from last night... I know we'll eat three tonight... who will get the last one?

Tuesday, May 5, 2009

Cinco de Mayo - Chile Relleno Casserole & Carnitas

More recipes from my Cinco De Mayo Party over the weekend. =)

It would be cool if I was one of those really together bloggers... who have all of their holiday recipes ready to roll out the week before a holiday... but usually mine all go out the week after the holiday. This time I'm lucky enough to be cranking a couple out just by the holiday!

On Friday Heather over at girlichef posted a yummy recipe for Chile Rellenos. I had been thinking about them before that... and her post pushed me over the edge of HAVING to have them! Coincidentally... she has a giveaway going on to win a TexMex cookbook, Food and Flavors of San Antonio by Gloria Chadwick.
Photobucket
Click HERE to check it out and enter!

Anyway... I mentioned wanting to make Chile Rellenos, but not wanted to fry stuff during the party. So Shane from Culinary Alchemy suggested Chile Rellenos Casserole.

This is based on his recipe and bunch that I browsed online.

Photobucket

Chile Rellenos Casserole
1.25 pounds lean ground beef
1/2 onion, chopped
4 cloves garlic, minces
1 TBLS epazote
salt & pepper
7 or 8 fire roasted poblano peppers, seeded and cut in half
3/4 lb shredded queso blanco
8oz tomato sauce
onion powder
garlic powder
oregano
salt & pepper

Topping:
1 1/2 C milk
1/4 C flour
1/4 C cornmeal
Salt & pepper
4 beaten eggs
Tabasco Chipotle Pepper Sauce

Preheat oven to 350F
Brown ground beef, onions and garlic.
Drain off excess fat
Season with salt, pepper and epazote.
Combine tomato sauce, onion powder, garlic powder, oregano and salt & pepper and pour into the bottom of a baking dish. (I think I used a deep 13x9 foil pan)
Place half the chilies on top of the tomato sauce.
Spread beef mixture over chilies.
Sprinkle shredded queso blanco over meat.
Arrange remaining chilies over the cheese.
In a bowl, combine the milk, flour, cornmeal, salt, pepper, eggs, and several dashes of Chipotle Tabasco sauce.
Beat until smooth.
Pour over the chilies.
Bake 45 to 50 minutes, or until a knife inserted in center comes out clean.
Let cool for 5 -10 minutes before serving, so the cheese has a chance to set back up.

~~~~~~~~~~~~~~~~~~~~~

You can check HERE or HERE for directions to fire roast the poblanos.

Preheat oven to 350F.

Saute onion and garlic with ground beef, epazote and salt & pepper.
PhotobucketPhotobucket

Combine tomato sauce, onion powder, garlic powder, oregano, and salt & pepper and pour a thin layer to coat the bottom of the baking dish.

Place a layer of poblanos over the top of the tomato sauce.
PhotobucketPhotobucket

Cover the poblanos with the ground beef... then the cheese... then the remaining poblanos.
PhotobucketPhotobucket

Whisk together topping ingredients and pour them over the top of the chilies.
PhotobucketPhotobucket

I really could have used one more poblano... so I filled in the blanks with diced canned green chilies.

Bake at 350F for 45 to 50 minutes, until eggs are set.

Remove from oven and let stand for 5 - 10 minutes before cutting.
Photobucket

~~~~~~~~~~~~~~~~~~~~~~~

And... since it's Cinco de Mayo... here is my Carnitas recipe too!

Photobucket

Is there anything better than shredded pork?

I started by putting a pork roast (Boston butt) in the crock pot overnight.
Photobucket

Photobucket

Add some onion & garlic
Photobucket

A chipotle pepper or two
PhotobucketPhotobucket

Some epazote & cumin and salt & pepper
PhotobucketPhotobucket

Put the cover on, turn the crock pot to low and go to bed!
Photobucket

In the morning... you should have something like this.
Photobucket

Scoop out the pork and shred it with forks.
Photobucket

Then spread it on a cookie sheet and bake at 350F until it's as caramelized and crispy on the edges as you like.
Photobucket

Now it's ready for tacos, burritos, enchiladas, quesadillas or just as is!
Photobucket

Enjoy!
Photobucket

Need more Cinco de Mayo recipes?

Check out these blogs...

At My Tasty Treasures ~ Donna's Grilled Chicken Fajitas

At Cinnamon Spice & Everything Nice ~ Reeni's Chicken Tortilla Soup

At girlichef ~ Heather has a ton of Mexican Recipes

At My Italian Grandmother ~ Michele's Chicken Enchiladas with Salsa Verde

At Good Things Catered ~ Katie's Mango Salsa

At Closet Cooking ~ Kevin has a TON of TexMex Recipes

And don't forget the Margarita Jello Shots!!!

Happy Cinco de Mayo and Happy Birthday Judy!!