Showing posts with label Christmas. Show all posts

Friday, February 4, 2011

Press Drop Cookies (that's Spritz Cookies to the rest of the world)

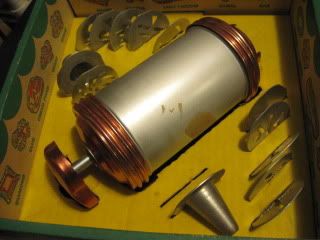
These are cookies that are made with a cookie press. I've had a few different styles of cookie press over the years, but I have to say my absolute favorite is the old style one my mom had. I ended up getting this beautiful tool on eBay a couple years ago.
Photobucket

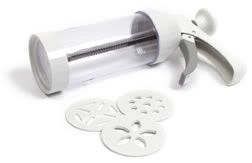
My first cookie press was the ratchet style.
Photobucket

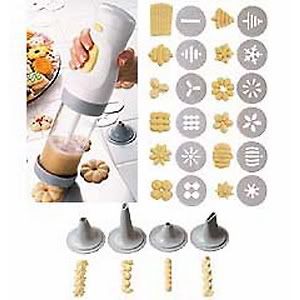
Then I had a couple of electric ones.
Photobucket

I hated the electric cookie press and to a lesser degree the ratchet style. The dough from the ratcheted press never seemed to come out at a consistent rate. The electric ones were even worse. I like the nice even turn of the screw from my vintage press.

Anyway... these cookies have been on Mum's Christmas Cookie trays for as long as I can remember. I know, you're saying, "Come on now Spryte, it's almost Valentine's Day." But really, even though I've only made these cookies at Christmas time, I'm going to make a concentrated effort to make them throughout the year this year!

The cookie discs are definitely usable for the whole year!

The only problem is I tend to forget which cookie discs I actually have. None of the discs from my previous presses are interchangeable and sometimes I end up looking for a disc from the past.

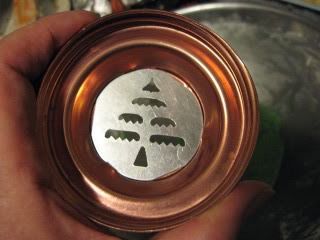
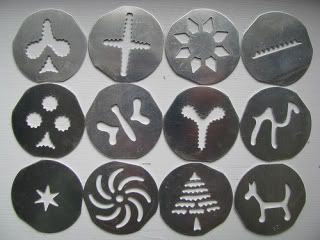
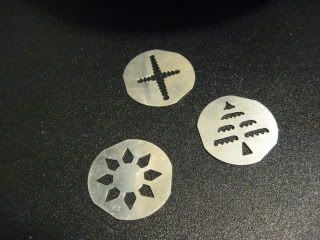
These are my current discs.
Photobucket

Of course there's the star for cheese straws and the little spikey line thing for bar cookies.

I have all the suites from a deck of cards. I could be making these every time we have friends over for an evening of cards & food.

The hearts and flowers would be great for Valentine's Day.

Butterflies & flowers are good all spring and summer, plus tea parties or bridal showers, or the Cookie Table at a wedding.

The dog, well.. maybe you could make some as a gift for your dog walker or vet... or those hard working people at the humane society.

The camel... hmmm... ummmmm... ok... I know! Hump Day! Everyone needs special cookies for Wednesday right?

I've been making these my whole life and I know this will sound dumb, but I only found out they were called Spritz Cookies within the past couple of years! Mum always called them Press Drop Cookies. So that's what I call them!

Press Drop Cookies
1 C shortening
3/4 C sugar
1 egg
1 tsp extract (almost is my favorite)
2 1/4 C flour
1/4 tsp baking powder
1/2 tsp salt

Preheat oven to 375F
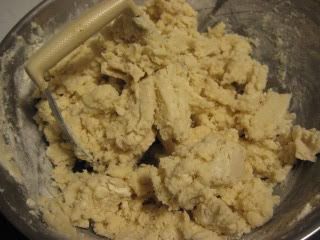
Cream together shortening, sugar, egg and extract. In a separate bowl, whisk together flour, baking powder and salt. Mix into shortening & sugar mixture until completely blended. I always color the dough. So when it's thoroughly mixed, add food coloring and mix until desired color is reached. Select a shape, load dough into barrel of cookie press. Press cookies out onto parchment paper lined baking sheets. Decorate with jimmies or colored sugars if desired. Bake at 375F for 7 - 10 minutes. Cool on racks.

~~~~~~~~~~~~~~~~~~~~~~~~~~~

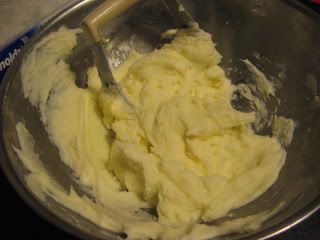
So cream together shortening, sugar, egg and extract. I almost always use almond, but really, you can use whatever you like! Lemon, peppermint, rootbeer, coconut, butter... it's totally up to you... ya know... just typing this out kinda makes me wanna change it up a little next time!
Photobucket

Mix in the flour mixture.
Photobucket

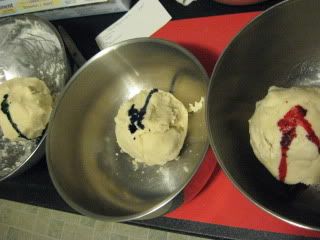
Time for color!

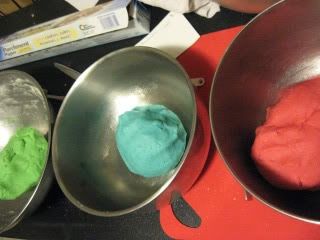
Green, Red & Blue
Photobucket

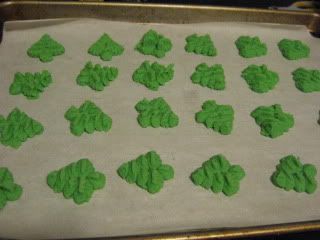
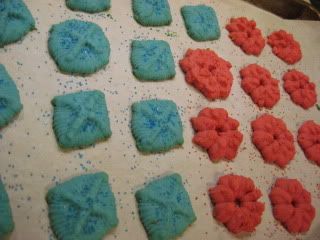
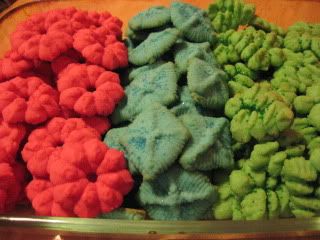
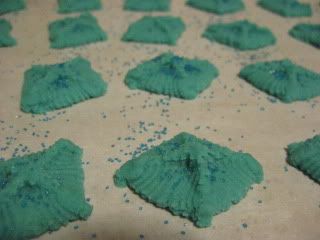
I was making Green for Christmas trees, Red for Poinsettias, and Blue for ummm.. for some reason I was thinking they were going to be Stars.. but they turned out to be diamonds... so Blue Diamonds! (aren't there Blue Diamonds in Lucky Charms?)
Photobucket

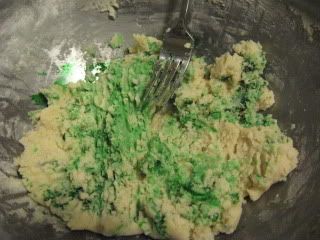
It takes a lot of mixing to get the colors worked through the dough.
Photobucket

But it does eventually get blended.
Photobucket

Insert your disc of choice.
Photobucket

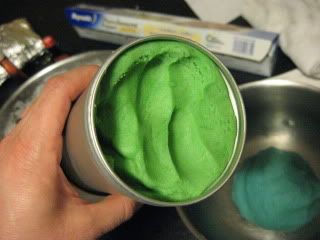
Load the barrel with the appropriately colored dough.
Photobucket

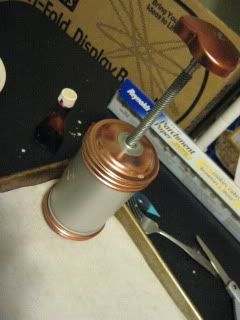
Screw down the press until dough is firmly packed in the barrel.

I find 1/3 of a turn to be the perfect amount for this dough.
Photobucket

Photobucket

You can sprinkle with sugars or jimmies or other decorations if you like.
Photobucket

Photobucket

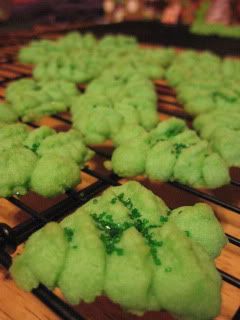
Bake at 375F for 7 - 10 minutes and cool on racks.
Photobucket

Enjoy!
Photobucket

These are definitely one of my kids favorite cookies. They'll be pretty psyched to see them pop up throughout the year.

Hey! I just thought of another occasion for the diamond shaped cookie!!

Yellow, Red & Blue Diamonds...
Photobucket

Go Steelers!!

Friday, December 24, 2010

Gingerbread Houses

Gingerbread Houses have become a family tradition for me. Most of my family started doing them many years before I did, because I moved across the country when I was 20 and totally missed out on the beginnings of it!

This is a long one... grab a cup of cocoa get cozy!


It started out with my Auntie Mary. My sister used to work Sunday mornings at the local coffee shop. While she was working, my Auntie Mary would watch my nephew Damien. If you're a long time reader of my blog, you met Damien back in my Chilaquiles post.

Anyway... Damien spent Sunday mornings with Auntie Mary and Uncle Joe, and with my cousins Annie and Frank, who are a few years older than him.

One Sunday morning, Auntie Mary thought it would be nice to bake cookies with the kids. Definitely not anything unusual for Auntie Mary. But on this particular Sunday, she decided it might be fun to make a gingerbread house for the kids to decorate.

And so there begins the tradition!

She made the first gingerbread house for the kids to decorate. Apparently, it was a success, because she's been doing it every year since!

She started inviting other little cousins over and it grew and grew until she was making more than 50 gingerbread houses a year!

She also started making a gingerbread manger every year for my grandmother; and my cousin Annie always goes all out on her house making it part of a big winter wonderland scene!

Anyway... when I moved back to Massachusetts, she invited me to bring Tawny and Bobby over to decorate and we were totally hooked!

I love to decorate houses with Auntie Mary whenever I'm in MA. But now I also do them with my kids and our friends and their kids too!

First... you need gingerbread houses.

This is Auntie Mary with a few houses she made!


She uses the Wilton Gingerbread Recipe.

Grandma's Gingerbread Recipe
5 to 5 1/2 cups all-purpose flour
1 teaspoon baking soda
1 teaspoon salt
2 teaspoons powdered ginger
2 teaspoons ground cinnamon
1 teaspoon ground nutmeg
1 teaspoon ground cloves
1 cup solid vegetable shortening
1 cup granulated sugar
1 1/4 cups unsulphured molasses
2 eggs, beaten

Preheat oven 375°F. Thoroughly mix flour, baking soda, salt and spices. Melt shortening in large saucepan. Cool slightly. Add sugar, molasses and eggs; mix well. Add four cups of the dry ingredients and mix again.

Turn mixture onto lightly floured surface. Knead in remaining dry ingredients by hand. Add a little more flour, if necessary, to make the dough firm. Roll out on a lightly floured surface to a 1/4 inch thickness and cut out house pieces with Wilton Gingerbread House cutters or with the attached templates

Bake 6-10 minutes for small to medium size cookies and 10-15 minutes for large cookies.

If you're not going to use your gingerbread right away, wrap dough in plastic and refrigerate. Refrigerated dough will keep for a week, but be sure to remove it 3 hours prior to rolling so it softens and is workable.

Royal Icing - to assemble houses and for decorating
3 level tablespoons Meringue Powder
4 cups sifted confectioners' sugar (approx. 1 lb.)
6 tablespoons water

Beat all ingredients at low speed for 7-10 minutes (10-12 minutes at high speed for portable mixer) until icing forms peaks.

Yields 3 cups of icing.

~~~~~~~~~~~~~~~~~~~~~~~~

I've only made them from scratch once. I have to say, I get intimidated working with dough... but once I get started, I always wonder what I was worried about!

Thoroughly mix flour, baking soda, salt and spices.


Melt shortening in a saucepan.


Add sugar, molasses and eggs; mix well.


Add four cups of the dry ingredients and mix again.


Turn mixture onto lightly floured surface. Knead in remaining dry ingredients by hand.


I cut the dough into sections and wrapped it, so it didn't dry out while I was cutting.


On a floured surface, roll out the dough to 1/4 inch thickness


I cut templates from a thin plastic cutting board to use as cutting guides.

Click Here for template to roof and sides.

Roof is the rectangular piece. Side is the square piece.

Click Here for template to front/back.

You can cut your own house pieces free hand. You can use the Wilton cutters too. The Wilton cutters do make a bigger house so you will get fewer houses per recipe.

Cut out your pieces.

You will need two of each shape for one house.


Bake at 375F for 10-15 minutes.


Cool on racks.

I cooled them overnight so they had a chance to harden up a bit before assembling the houses.


I had some extra dough... so there are a few cookies too!

Now for assembly!!

This is MUCH easier with an extra pair of hands!

Make the royal icing and use it as glue to hold all of the pieces together. Try to wait about an hour before you put the roofs on. It gives your foundation a chance to harden.

Start with a strip of icing on the bottom of a front/back piece and attach it to your base. I used heavy paper plates for bases this time.


Apply icing to the side and bottom edge of a side piece and attach it to the front/back piece.


Now attached the other front/back piece.


Then the other side.


Auntie Mary adds little candy canes to the corners. I did it when I made them from scratch... but this year I was very short on time... so I cheated and used kits. That only cuts out the baking. You still have to assemble. But I left out the candy canes this year.


I like them both ways... but the candy canes don't really fit the kit pieces.

Some pieces might need to be trimmed at bit to fit together better.


Put together all the bases... then you can start adding roofs.


Not bad for a first time! (don't mind the miscellaneous condiments)


That's the batch I made from scratch last year.

And these I assembled from kits this year.


Now invite your friends and family. Have everyone bring candies to share for decorations... and let the fun begin!!

These are random shots of gingerbread house decorating at my sister's house with Auntie Mary and with my family and friends at my house.


Gingerbread houses make memories that last a lifetime!

Thank you Auntie Mary! I love you!

Merry Christmas everyone!