Tuesday, September 22, 2009

White Castle Style Sliders

I was looking for fun easy dinner ideas and thought sliders might be fun.

They remind me of the old-timey drive-in style places. I don't know why; since I've never been to one!

I decided I wanted to make White Castle style sliders... even though I've never had a White Castle burger... or even seen a White Castle. I guess my only experience with White Castle is watching Harold and Kumar go to White Castle on TV. I'm not sure that counts. But, if people would really go to that much trouble for White Castle Burgers, they must be good right?

So I started looking around the interwebs and found Robin Sue's White Castle Like Sliders: A How To over at Big Red Kitchen.

They looked wicked easy and so tasty!


White Castle Style Sliders (slightly modified)
1/2 C dehydrated onion flakes
2 lbs ground chuck (80/20 ground beef)
seasoned salt
6 slices cheddar cheese
24 dinner rolls
24 dill pickle slices (I omitted these)

Preheat oven to 400F.
Sprinkle dehydrated onions evenly into a 13x9 baking dish. Then press ground chuck over onions and sprinkle with seasoned salt.
Bake for 20 minutes. Remove from oven. Blot up grease on top of burger with paper towels. Cover giant burger with cheddar cheese slices. Then pop it back into the oven for a couple minutes, just to melt the cheese.
Cut into 24 pieces and serve in dinner rolls, be sure to scoop up some of the yummy onions with each slider.

~~~~~~~~~~~~~~~

Sounds pretty easy right?

It totally is!

Sprinkle the onions into the baking dish.


This turned out to be just about how much was in a full bottle.

I typically use leaner beef than this, but for this recipe, you need the extra fat to rehydrate the onions.


Evenly cover the onions with the ground chuck.


Then sprinkle with your favorite seasoned salt.

No surprise I'm sure, Penzey's Smoky 4/S for me.


Then toss it into a preheated oven for 20 minutes.


Ok... that comes out wicked greasy. So you definitely have to sop up all the grease from the top with paper towels.


Now cover the top with 6 slices of cheese.

Lilly's not a cheese fan, so I only used 5 slices.


Pop it back into the oven to melt the cheese.

Get your rolls ready.


After the cheese is melty (5 minutes or so) take it back out of the oven and cut it into 24 even pieces.


Now start topping all of the prepared buns.

Be sure to get some of the onions on the bottom with each slider.


If you're adding pickle slices, this is the time.

I'm not opposed to pickles, but half of the family is. It's just easier for me to skip this step.


That's it!


These were really fun to make and fun to eat!

I served them with Chili Cheese Fries.

These would be great for watching the game, or if you have a bunch of your friends over, or a bunch of your kids' friends, or just a quick fun dinner!

Thanks for posting your recipe Robin Sue!

I'll definitely be making these again!

Tuesday, September 15, 2009

Donna's Banana Pudding Pie

I had a few bananas that were on their way to very ripe. I was going to just whip up a banana bread, but Tawny asked for Banana Pudding with Vanilla Wafers.

I'd never made one before and while doing a search I found a recipe on one of my favorite blogs, My Tasty Treasures.

Photobucket

Donna's Banana Pudding Pie
For the pie:
65 Vanilla wafers (divided)
5 1/3 TBLS (2/3 stick) butter, melted
2 ripe medium bananas, thinly sliced
For the Vanilla Pudding:
1/2 C sugar
1/3 C flour
1/4 tsp Kosher salt
2 C milk
4 large egg yolks, lightly beaten
2 tsp vanilla extract
For the Whipped cream:
1 C heavy cream
2 TBLS sugar
1 tsp vanilla extract

Preheat oven to 350F.
Grease a 9in pie plate and set aside.

Finely crush 45 Vanilla Wafers and reserve 1/4 C of the crumbs for the topping.
Mix remaining crumbs with melted butter and press evenly in pie plate.
Bake 10 minutes in preheated oven. Remove from oven to cool.

Time to make the vanilla pudding.

In a saucepan over medium heat, combine the sugar, flour, and salt. Whisk in the milk and stir constantly with a wooden spoon until the mixture comes to a low boil and becomes thick, about 7 minutes. Reduce the heat to very low. Stir a couple of tablespoons of the hot milk mixture into the beaten egg yolks. Stir the egg yolks back into the hot mixture in a slow steady stream. Stir constantly until the mixture is thickened to the consistency of pudding, 3 to 4 minutes. Remove from heat, and stir in vanilla.

Place half of the sliced bananas evenly in the pie crust. Cover them evenly with half of the vanilla pudding. Cover the pudding with about 20 of the remaining Vanilla Wafers. Then the rest of the bananas, followed by the rest of the pudding.
Cool completely in the refrigerator.

When the pie is completely cooled and you're ready to serve, it's time to make the whipped cream.

In a cold bowl, with an electric mixer, beat cream, sugar and vanilla on high until you have whipped cream consistency.

Spread whipped cream over cooled pie and sprinkle with reserved crushed Vanilla Wafers.

~~~~~~~~~~~~~

I crushed the Vanilla Wafers in my food processor. But you could just as easily use a plastic bag and a rolling pin.

Mix with melted butter. (don't forget to reserve 1/4 cup of crumbs)

Press into greased pie plate.
PhotobucketPhotobucket
Photobucket

Bake for 10 minutes in preheated oven.

For the vanilla pudding.

Mix sugar, flour, and salt. Then whisk in the milk and stir constantly with a wooden spoon until the mixture becomes thick.
PhotobucketPhotobucket
Photobucket

Stir a few tablespoons of the hot milk mixture into the beaten egg yolks and add the egg yolks to the hot milk mixture, stirring constantly. Continue stirring until it's pudding consistency.
PhotobucketPhotobucket
Photobucket

Remove pan from heat and stir in vanilla.
PhotobucketPhotobucket

Now arrange half of the banana slices in the pie crust.
Top with half of the pudding, add a layer of Vanilla Wafers.
Repeat.
PhotobucketPhotobucket
Photobucket
PhotobucketPhotobucket

Now refrigerate until completely cooled.

While I was waiting for it to cool completely, I made Chicken Saltimbocca and Creamy Parmesan Polenta for dinner.

Photobucket

After dinner whip up your cream.
Spread the whipped cream over the pie and sprinkle on the reserved crushed Vanilla Wafers.
PhotobucketPhotobucket

Dessert time!

Photobucket

The kids and I LOVED this! Jon's not a banana fan, so he didn't have any.
It was creamy and delicious!
Exactly what Tawny was looking for!

Donna this recipe ROCKED! I'll definitely be making it again!

This is for you!
Photobucket
Thanks so much for posting it!

Monday, September 14, 2009

Spaghetti Tacos

When I saw Spaghetti Tacos on Tried-and-True Cooking with Heidi, I knew I had to make them!

Like Heidi's kids, my kids also watch iCarly on Nickelodeon. I've seen Carly's brother Spencer whip up a big batch of Spaghetti Tacos for Carly and her friends, but it never occurred to me to actually make them. Well, not until I saw Heidi do it!

Photobucket

Spaghetti Tacos
Spaghetti with meat sauce (your favorite)
Taco Shells

Put cooked spaghetti with meat sauce into heated taco shells.
Eat!

Yup... that's it!

I didn't tell anyone what I was making for dinner until it was almost ready.

Jon was not excited. He said he'd eat one, but he really wasn't happy about it. He'd never heard of them and said that he doesn't like spaghetti with the sauce mixed in (it should be on top) and it definitely doesn't belong in a taco shell.

Bob didn't seem to care either way, but he knew what they were.

Lilly knew what they were and was very excited we were having Spaghetti Tacos.

Tawny didn't know what they were, or where I came up with them. She was on the phone with a friend while we were talking about it and he knew right away what Spaghetti Tacos were. She also was not excited about the idea.

Bob tried them first. He took one bite and dumped the spaghetti out of the taco shell and just ate it from the plate. Definitely not a winner in his book. But he will eat mountains of spaghetti, so not a total loss.

Lilly loved them right away and asked for another. Definitely a winner for Lilly.

Jon ate his Spaghetti Taco, but remained not thrilled about it. He opted for some additional spaghetti on his plate. But since it was already still mixed with sauce, still wasn't wicked thrilled. Dinner = FAIL for Jon!

Tawny wasn't thrilled at first, but then decided she really liked it and also had another Spaghetti Taco. Actually, last night she was looking for leftover spaghetti to make a Spaghetti Taco. Definitely a winner Tawny.

I had two. They were interesting. Can't say that I loved them. But they also weren't gross.

I really made them for the fun factor of making an unusual food that the kids see on TV. I thought they'd get a kick out of it. And they did. Ok... two did, and one wasn't mine, it was Tawny's friend on the phone.

But both girls loved them. Bob loves spaghetti. Jon and I, well... we had an unusual dinner.

Will I make them again? Probably not. But, Tawny probably will. I always have taco shells and often have leftover spaghetti.

Photobucket

If your kids watch iCarly, you should give these a try for a fun dinner. Even though I didn't really enjoy eating them, it was a lot of fun making them and surprising the kids!

Friday, September 11, 2009

POM-a-RITA ~ Oh yeah!!

Molly over at POM Wonderful was kind enough to send me a case of POM Wonderful 100% Pomegranate Juice.

Photobucket

I have to say... I was pretty excited when it arrived in the mail yesterday.

Eight, eight ounce bottles of that fabulous, deep, rich, red, tart and sweet juice!

What to make first? Ok... yesterday was a little busy. So I just popped it in the fridge to ponder my options.

I was remembering the Pomegranate Jelly one of my co-workers in California used to bring to work. It was sooooo good!!! I always wanted to try my hand at making it, but prepping all those pomegranates? That seemed like a lot of work. Maybe I can make some with this juice!!

But that's definitely not a Friday night project.

The perfect Friday night project would be a POM-a-RITA!

My husband Jon makes the BEST margaritas on the planet. I know if we have all of the ingredients in the house, all I have to do is ask and he'll make me a margarita that will totally melt away all the stress of the day in just two sips.

So when I got home tonight, I asked him to make me one, but with POM Wonderful 100% Pomegranate Juice instead of sweet & sour.

He readily agreed! YAY! He's so cool. =)

Thanks Baby!! *kiss*

So he gathered the ingredients.

Photobucket

OK... how lame is that pic?? My kitchen is so small that I have no place that doesn't have the coffee maker & supplies, the kitchen sink, the toaster oven, the FoodSaver, or a bunch of spices that don't fit in the spice cabinet, in the background... so every once in a while, when the background just looks too busy... I pull out this white project board.

It really isn't any better.

Oh well... someday I'll have a big spacious kitchen...

Anyway... this is what you need.

POM-a-RITA
2 parts Sauza Hornitos Reposado (my FAVORITE tequila)
1 part triple sec
3 parts POM Wonderful 100% Pomegranate Juice
a little Rose's Lime Juice
a lime, cut into wedges
ice
salt

Pour about a tablespoon of Rose's Lime Juice in a saucer and dip the rim of a glass in it.
Then dip the rim of the glass into some Kosher salt.
Photobucket

Set the glass aside.

Fill a cocktail shaker about 2/3rds full of ice.
Pour the Rose's Lime Juice into the shaker and add the tequila, triple sec, POM Wonderful 100% Pomegranate Juice.

Cover and shake vigorously, then pour into the salt rimmed glass.

Squeeze 3 or 4 lime wedges (I love lime) into the glass, toss the squeezed lime wedges into the glass.

Enjoy!!

Photobucket

These were AWESOME!!!

Perfect mix of sweet and tart for a perfect POM-a-RITA!

You will definitely see more POM recipes here!!

If you haven't tried POM Wonderful 100% Pomegranate Juice yet, run out and get some now!

Not only does it taste great, it's wicked healthy!!

Healthy AND tastes good?? Don't believe me? Check THIS out!

Thanks Molly!! You ROCK!!

Thursday, September 10, 2009

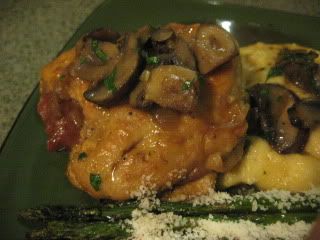
Chicken Saltimbocca ~ Coast to Coast Cooking at BakeSpace

This is our third Coast to Coast Cooking from BakeSpace. I'd have to say, this has been my favorite so far.... Saltimbocca.

We had a lot more cooks this time and went as far away as Alaska and Italy!

I knew I wanted to make a Chicken Saltimbocca and looked at a ton of recipes online before finally settling on a Mario Batali recipe. I've never been a big Mario Batali fan. His show never really interested me, because he was mostly cooking things I wasn't remotely interested in cooking. But after trying this recipe, maybe I should give him another look!

I pretty much followed his recipe. I just increased the sauce by half and changed the oyster mushrooms for cremini. This reflects my changes.
Photobucket

Chicken Saltimbocca with Mushroom Marsala Sauce
1 C flour
Salt and pepper
4 (8-ounce) chicken breasts
4 large slices prosciutto
4 large sage leaves, plus 20 smaller leaves
1 cup extra-virgin olive oil
4 shallots, thinly sliced
1/2 pound cremini mushrooms, sliced into 1/4-inch pieces
1 1/2 cup dry Marsala wine
3/4 cup chicken stock
2 tablespoons butter
1 bunch Italian parsley, chopped to yield 1/4 cup

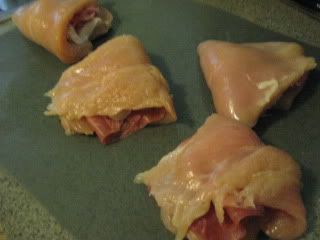
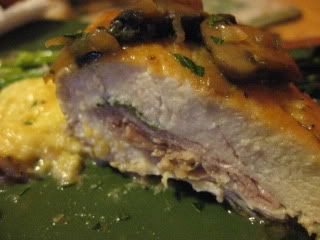
Pound chicken breast to 1/4 inch thickness. I'm really bad at this, so I just fillet them to that size. Season chicken with salt & pepper. Place one slice of prosciutto and one large sage leaf on each chicken breast. Then fold each chicken breast in half, like you're closing a book.

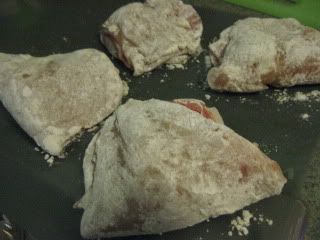
Dredge each folded chicken breast in flour and set aside.

In a small heavy pan, heat olive oil to 350F. Fry remaining sage leaves in oil for about 30 seconds. They cook VERY quickly so have a slotted spoon or spider ready. Don't walk away! Drain on a paper towel and season with a sprinkle of salt. Set aside.

Scoop out a few tablespoons of the oil that you used to fried the sage leaves and put it into a large hot skillet. Saute the folded, floured chicken breasts until golden on both sides. Add shallots and mushrooms and cook for about 5 minutes. Add Marsala wine and chicken stock. Simmer until liquid has reduced by half or three quarters. Stir in butter. Add parsley. Garnish with fried sage leaves.

~~~~~~~~~~~~~~~~~~~~~~

Ok, I started with frying the sage leaves. At first I wasn't going to. I was just going to skip them completely. Mario's recipe called for 2 cups of olive oil. HELLO!! That's a lot of olive oil!! Then I decided to use a little pan and half the oil.

I'm really glad I didn't skip this step.
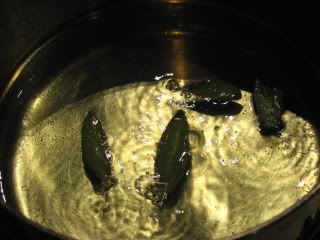
Photobucket

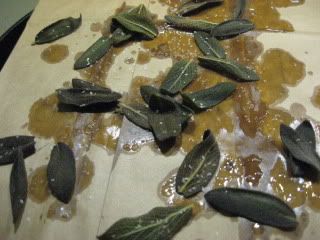
This was fun. Sage leaves are kinda thick and furry, and lots of them are rolled in on themselves. As soon as they hit the oil, they totally flatten out.

They cook wicked quick and turn into the most delicious little chips!
Photobucket

Most of these got eaten prior to garnish! I did use some to garnish some yummy Creamy Parmesan Polenta.

So... on to the chicken.

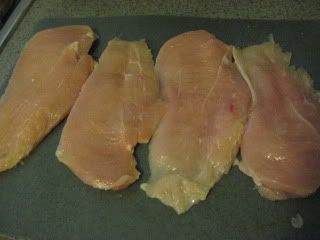
I'm really bad at pounding meat flat. I usually just opt to slice it really thin. Which only makes it thin, it doesn't make increase the surface area. But it worked.
Photobucket

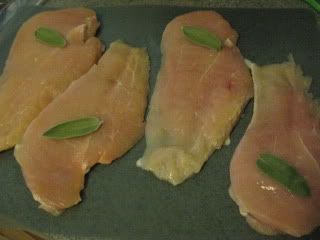
Add a sage leaf to each breast. (next time I'd add more sage)
Photobucket

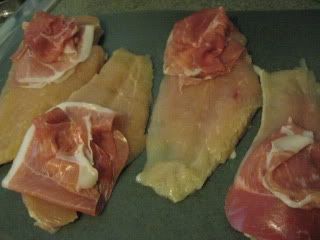
And prosciutto (I used 8 very thin slices for 4 breasts)
Photobucket

Fold in half
Photobucket

Dredge in flour
Photobucket

Mario's recipe called for additional olive oil to saute the chicken. But I decided to use the oil that I fried the sage in. I figured it had to pick up some yummy sage flavor.

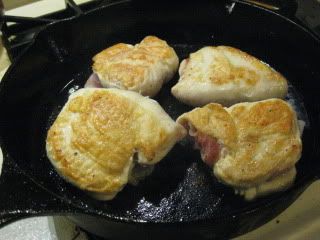
Saute chicken breasts until browned on both sides.
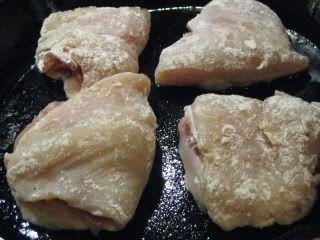
Photobucket

Mmmm... don't they look beautiful??
Photobucket

Add the shrooms and shallots and cook for about 5 minutes.
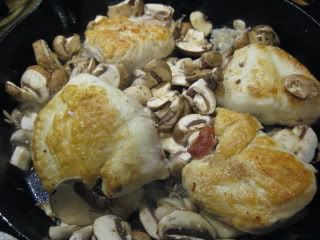
Photobucket

One of my chicken breasts was considerably thicker than the others, so I covered it with a mini skilled to give it a little extra heat. I wanted to be sure it was cooked through.
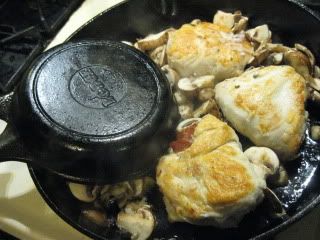
Photobucket

So cook about 5 minutes until mushrooms have sweated.
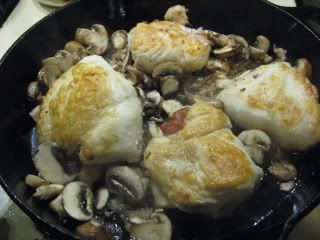
Photobucket

Add Marsala wine...

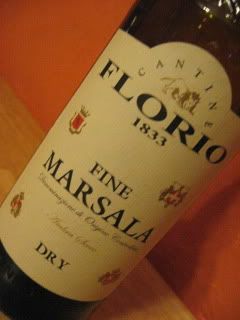
I used a dry Cantine Florio Marsala... It was around $11
Photobucket

Last time I made something with Marsala, Jon said he didn't really like it. I knew I had probably used a sweet Marsala last time, so I picked dry this time. Plus this wine was rated at 88 points. (I guess that's supposed to be pretty good!)

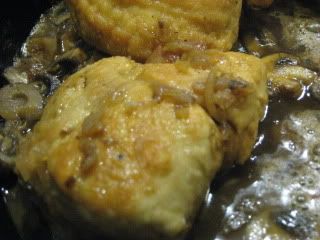
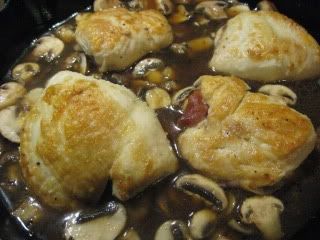
Anyway... add Marsala & chicken stock and simmer until liquid has reduced by half (or 2/3rds)
Photobucket

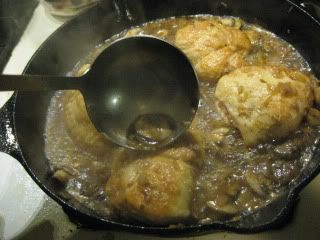
I kept ladling this intoxicating broth over the chicken while it simmered.
Photobucket

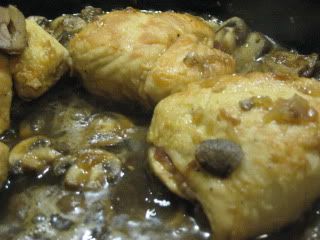
When the liquid is reduced, it's ready to serve.
Photobucket

Isn't that gorgeous???
Photobucket

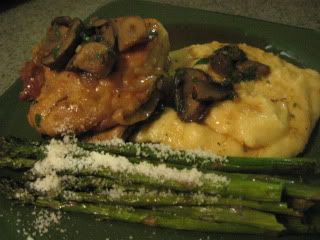
I served it with Creamy Parmesan Polenta & Roasted Asparagus with Parmesan.
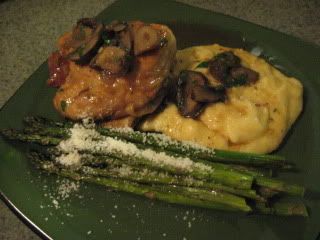
Photobucket

The Mushroom Marsala Sauce was TO DIE FOR on the Creamy Parmesan Polenta.
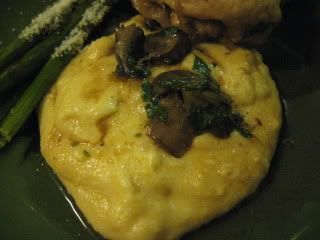
Photobucket

The whole dinner was fabulous!
Photobucket

Photobucket

Yup... that's where I licked the plate. I HAD to!
Photobucket

This recipe is DEFINITELY a keeper!

Mario Batali, I'm sorry for doubting you!

But this wouldn't be Coast to Coast Cooking at BakeSpace if I didn't share some recipes from my fellow BakeSpacers with you, right?

So, this time we'll be boarding the BakeSpace Train and heading out to Burbank, California to check out Danielle's Saltimbocca. All Aboard!!
Photobucket
Wow!! Doesn't that look great?!
You can see Dani's recipe HERE at Cooking for My Peace of Mind.


Please have your tickets ready... we're heading out to Southwest Ohio to check out Sheryle's Chicken Saltimbocca with Lemon Sauce.
Photobucket
Yum... that looks so good!!
You can see Sheryle's recipe HERE at Cookie Baker's Corner. Looks like she's got a lot more than cookies baking over there!

Next stop... Indianapolis, Indiana for DD's Traditional Veal Saltimbocca with a Wine Reduction Sauce.
Photobucket
Mouthwatering!
You can see DD's recipe HERE at DDPie's Slice.

Our next stop is a bit further, you can relax a while in the Club Car! We're on our way to Mound, MN for Cathy's Chicken Saltimbocca with Creamy Mushroom Cavatappi.
Photobucket
Mmmmm... pass me a fork!
You can see Cathy's recipe HERE at The Dutch Baker's Daughter.

You have plenty of time to head to the Sleeper Car for a nap, because we're heading all the way back to San Diego, California for Shane's Saltimbocca al Bisonte! Bisonte is Bison! YUM!
Photobucket
Shane will usually give us something a little more interesting and his Bison didn't disappoint!
Check out Shane's recipe HERE at Culinary Alchemy.

Now be sure to have your cameras ready for this leg of the trip because we're heading out to Seward, Alaska to check out Moni's Pork Saltimbocca over Grilled Polenta.
Photobucket
Mmmm.. pork is my FAVORITE!
Check out Moni's recipe HERE at Alaskan Dermish in the Kitch.

We've chartered a private jet for our next stop, which is Modena, Italy for Dajana's Veal Saltimbocca all'Ortolana
Photobucket
Delectable!
You can see Dajana's recipe HERE at Baker's Corner... Somewhere in my Kitchen.

Seats & Tray Tables in their upright positions as we take off for Morris Plains, NJ for Michele's Chicken Saltimbocca Pasta Toss.
Photobucket
That looks great right? But don't stop there!! Chicken Saltimbocca is one of Michele's signature dishes.
Photobucket
You can see Michele's Chicken Saltimbocca Pasta Toss HERE and her Chicken Saltimbocca HERE at My Italian Grandmother.

All Aboard! Back on our BakeSpace Train we're heading back to Indianapolis, Indiana for Pamela's Slim Saltimbocca.
Photobucket
YUM! Doesn't look slim to me!
Check out Pamela's recipe HERE at Pamela's Palace2.

And all the way back to the west coast to Banning, California for Matt's Chicken Saltimbocca - Reconstructed.
Photobucket
*DROOL*
And you can see Matt's recipe HERE at The Outlaw Gourmand.

Now we have a very cool Coast to Coast Cooking Map!

Click the map to check it out!
Photobucket

Why aren't you cooking with us yet?

Check out the Coast to Coast Cooking threads at BakeSpace!