Wednesday, September 29, 2010

Baked Rachel Dip

A couple of weeks ago, I was looking for something different and easy to make for a football snack.

I found Cathy's recipe from Noble Pig for Reuben Dip. But I was looking for something with no red meat.

So I decided to make it into Baked Rachel Dip, using Butterball Turkey Pastrami!

Photobucket

Baked Rachel Dip
1/2 pound diced turkey pastrami
1 package (8 ounces) cream cheese, softened
1 cup shredded Swiss cheese
1 cup sauerkraut, drained well
1/2 cup sour cream
1 tablespoon ketchup
1 tablespoon spicy brown mustard
cocktail rye bread

In a medium bowl, combine turkey pastrami, cream cheese, Swiss cheese, sauerkraut, sour cream, ketchup and mustard. Transfer to a greased, 1-quart baking dish.

Bake at 350F for 30 minutes, until heated through and bubbly. Serve warm with cocktail rye bread.

~~~~~~~~~~~~~~~~~~~~~~~~~~~~~~~~~~~~~

Drain sauerkraut.
Photobucket

I really liked that this recipe only calls for a cup of sauerkraut. I bought one 8 oz can and had no leftovers to deal with!

Cut turkey pastrami.
Photobucket

Photobucket

Mix it all up up (except the rye bread)
Photobucket

Then into the oven for 30 minutes until it's heated through and bubbly!
Photobucket

How easy is that??!!!

Photobucket

Ok... dip isn't so pretty to look at... but it tastes sooo good!!

I've tried Reubens a couple of times and never really cared for them. I like all of the ingredients on their own, but together, it just doesn't do it for me.

Maybe I'd like a Rachel? I don't know. But in dip form, this totally rocks!!

It's wicked fast and easy and everyone LOVED it!

Need a quick easy appetizer? Definitely try this!

Friday, September 24, 2010

Baked Jalapeno Poppers

So last Friday I opened my email and the Daily Dish email from allrecipes.com was Jalapeno Poppers. Nice! I'll check it out. I only actually open a handful of those Daily Dish emails. If the dish doesn't seem appealing, I delete it, unopened. Maybe I lose out on some winners that way. But I get a lot of daily recipes, so I pretty much only open the ones that instantly seem interesting. (I do have a TON of appealing Martha Stewart Cookie of the Day emails saved!)

So last Friday was Jalapeno Poppers I!

That got an instant open. 4.5 Stars & 238 Reviews! Ohhhh and they're baked!! This is looking good! After reading all of the reviews, with everyone's changes & comments, I decided I would definitely be making these for the Steelers game!

This reflects my version of Jalapeno Poppers I

Photobucket

Baked Jalapeno Poppers
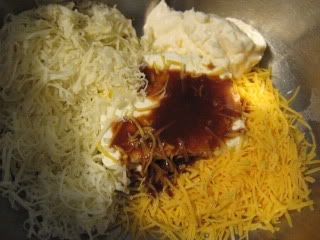
2/3 of 8 oz package cream cheese,softened
1/3 C sharp cheddar cheese, shredded
3/4 C pepper-jack cheese, shredded
1/4 cup mayonnaise
1 TBLS Chipotle Tabasco
12 fresh jalapeno peppers, halved lengthwise and seeded
1 egg, beaten
splash of water
1 1/2 cups finely crushed corn flake cereal
1 - 2 tsp Penzey's Arizona Dreaming Seasoning
Olive Oil mist

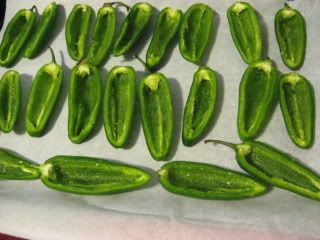
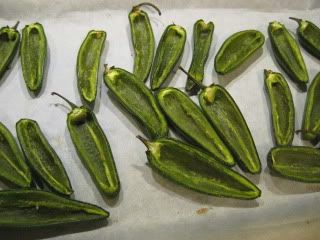
Cut & seed Jalapenos; place them on a parchment paper lined baking sheet and bake 15 minutes at 325F. This is just to take the crunch off them. Allow to cool to room temperature.
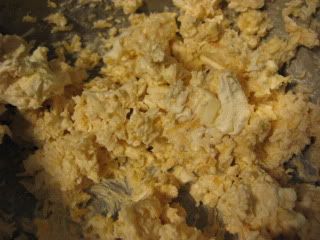
While they're cooling, combine cheeses, mayo & Chipotle Tabasco.
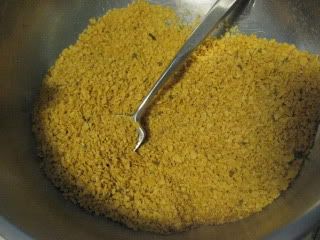
Crush cornflakes. I did this in my KitchenAid food processor until I had fine crumbs. Mix Arizona Dreaming Seasoning with cornflakes.
Fill cooled jalapenos with cheese mixture. Whisk egg w/water and brush the tops off the filled peppers. Sprinkle seasoned cornflake crumbs over each pepper. Lightly spray peppers with olive oil.
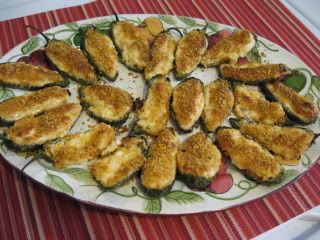
Bake at 325F for about 30 minutes. Serve plain or with dipping sauces of your choice!

~~~~~~~~~~~~~~~~~~~~~~
Slice jalapenos lengthwise & seed.
Photobucket

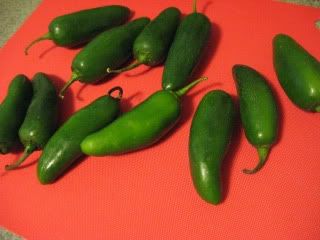
Be sure to wear gloves for this part. You'd be surprised at how hot jalapenos can be, especially if you touch your eyes or some more delicate areas!
Photobucket

Lots of the reviews said that the peppers were a little too crunchy when prepared according to the original recipe and some people blanched them to get around that. For whatever reason, that just felt weird to me, so gave them a little pre-bake.
Photobucket

Mix up the cheeses with mayo & Chipotle Tabasco.
Photobucket

Photobucket

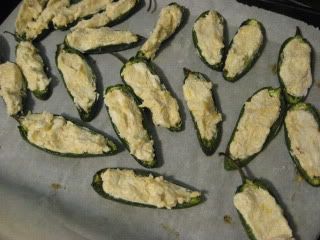
Pipe the cheese mixture into the cooled jalapenos.
Photobucket

Honestly, this was a little thick to come through a baggie. I would have been better off with an actual piping bag. But going slowly, the baggie worked out ok.
Photobucket

Whisk up the egg with a little water.
Photobucket

And brush it onto the filled jalapenos. I did about 5 or 6 at a time. You want the egg wash to be nice and wet to hold the crumbs.
Photobucket

Season the crushed cornflakes with Arizona Dreaming.
Photobucket

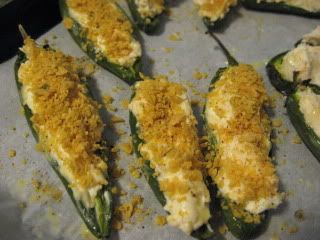
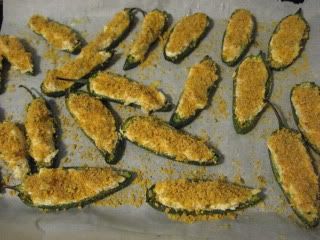
Sprinkle your seasoned cornflake crumbs on top of the egg-brushed poppers. Again working in batches of 5 or 6 peppers at a time.
Photobucket

At this point, I put my tray of poppers into the fridge. Because I had an hour or so before the game. You could even put them in the freezer if you were working ahead for a future party.

Time to bake them. Preheat the oven to 325F. Lightly spray each pepper with olive oil.
Photobucket

I have both of these oil misters. I got them at Sur La Table
PhotobucketPhotobucket
I LOVE them!!
The white one on the left has a little filter on the tube, so you can put herbs or spices in your oil and they don't clog up the sprayer. The one on the left comes in 4 fun colors and is a little cheaper. Both work great and I use them ALL the time!
Ok... end review of oil misters! Back to the poppers!

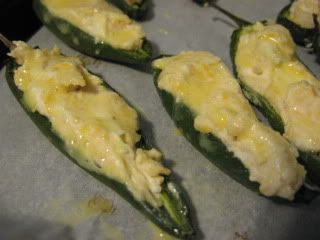
After you mist the poppers with oil (for fun you could use garlic oil or bacon oil or chile oil or cilantro oil... you get the idea!) pop them into the pre-heated oven for about 30 minutes.
Photobucket

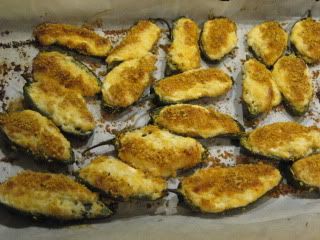
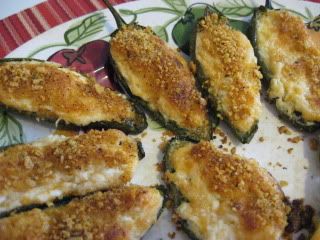
The topping is nice & crunchy!
Photobucket

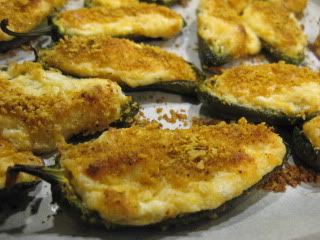
These really came out awesome and will be definitely show up on the Football Menu at my house often!
Photobucket

The cheese didn't leak out. They were wicked easy to make. They can be made ahead of time. The topping is crunchy, the filling is creamy and a little spicy. I served them with ranch dip. But a berry dip might be nice too!

Definitely a winner!

What's on your football menu this week?

Wednesday, September 22, 2010

It's-Its ~ the San Francisco Treat!

So Jon has been asking me to make It's-Its for him for probably over a year. I'm kind of a slacker... or procrastinator.

I like to try to recreate the foods he remembers.

Anyway... what's an It's-It you ask?

If you're not from the Bay Area, you probably have never heard of them. I know I hadn't.

An It's-It is a Chocolate Covered Ice Cream & Oatmeal Cookie Sandwich.

Photobucket

It's-It
Oatmeal Cookies
Vanilla Ice Cream (or any flavor you like)
Chocolate

That's all you need.

Unfortunately I missed that they were covered in Dark Chocolate, so mine ended up being covered in Milk Chocolate. But they still turned out yummy.

Since I was making them at home, I used Homemade Oatmeal Cookies and Homemade Vanilla Ice Cream. And since Jon loves chocolate, I made some with chocolate ice cream too. But I only have one ice cream maker... so only the vanilla was homemade!

First, get the chocolate melted.
Photobucket

Now you have to work kind quickly.

Warm melty chocolate & cold ice cream, don't play nice out in the hot kitchen.

So start with cookies, flat side up.
Photobucket

Top with a big scoop of ice cream.
Photobucket

Top with another cookie.
Photobucket

It helped that these cookies were pretty flat and chewy, so they didn't snap when I pressed everything together.

Now into the melty chocolate...

This super fast action shot is kinda blurry...
Photobucket

That came out way better than you thought it would, didn't it?
Photobucket

Ok, it came out way better than I thought it would!

Working with warm chocolate and ice cream was a little more challenging than I anticipated.

I did a couple of vanilla... now time for some chocolate.
Photobucket

Photobucket

And into the chocolate.
Photobucket

Ok... two of each.
Photobucket

Now quickly into the freezer!

Fast forward a couple of hours after dinner...
Photobucket

Ok... some leakage definitely occurred.
Photobucket

It kinda looks like it has a tongue!

At a couple/few hours... these were still kind of a melty tasty mess.
Photobucket

But Jon definitely liked them.

But, the next day, after sitting over night in the freezer, the remaining It's-Its were much better looking. And they held together when you ate them!
Photobucket

Less leakage...and neat and tasty!
Photobucket

Jon considered this a win!

If you're longing for this San Francisco treat, you can totally make it at home!

Oatmeal Cookies

So I needed to make some Oatmeal Cookies to make a frozen treat that Jon remembered from his childhood.

I LOVE my sister's oatmeal cookies, so I asked her for the recipe. She sent it. Months went by before I actually got around to making the frozen confection from years gone by and her recipe was languishing in my work email inbox.

Fast forward to a few weeks ago. I decided it was time to indulge Jon's wish. But alas, I was at home with no access to Jeannie's Oatmeal Cookie recipe. *sigh*

What to do...

Look for another online of course!

I chose this Excellent Oatmeal Cookies recipe and made a couple small changes. Should be good with Excellent right in the title right?

This reflects my changes (notice I dropped the Excellent from the name?)

Photobucket

Oatmeal Cookies
1 C butter, softened
1 C packed brown sugar
1/2 cup white sugar
2 eggs
2 tsp vanilla extract
1 1/4 C all-purpose flour
1/2 tsp baking soda
1 tsp salt
3 C quick cooking oats

Preheat oven to 325F.

Cream together butter, brown sugar, and white sugar. Beat in eggs one at a time, then mix in the vanilla. In a separate bowl, whisk together flour, baking soda and salt. Mix into the butter/sugar mixture. Mix in oats until just blended. Drop by heaping spoonfuls onto parchment paper lined cookie sheets. Cookies should be at least 2 inches apart.
Bake for about 12 minutes. Cool on a wire rack.

~~~~~~~~~~~~~~~~~~

Ok... you know the drill...

Cream together butter, brown sugar, and white sugar.
Beat in eggs one at a time, then mix in the vanilla.

Photobucket

Whisk up the other dry stuff (flour, baking soda, salt)
And mix that in.

Photobucket

Mix in the oatmeal.

Photobucket

Drop by spoonfuls onto parchment paper lined cookie sheets.
Photobucket

Bake at 325F for about 12 minutes... cool on rack.

Photobucket

These came out very thin. (Jeannie's are much fluffier) But they were very chewy. I enjoy a chewy cookie. But Jon likes his crisp.

Were these excellent? Ummm I'd say they were ok. To be fair, I did omit cinnamon. I didn't want a cinnamon oatmeal cookie. I also omitted nuts. I would have added walnuts, but I'm out of them. (how the heck does that happen??) Nuts definitely would have made them better, but I don't think excellent.

Photobucket

Flat chewy oatmeal cookies turned out to be just the thing I needed to grant one of Jon's food wishes.

Stay tuned for homemade It's-Its!