Showing posts with label Cake. Show all posts

Thursday, August 9, 2012

Hefeweizen Cupcakes

I really don't remember how I stumbled across this recipe on Beantown Baker's blog, but Jen the Beantown Baker has an amazing collection of cupcake recipes and loads of other delicious looking yumminess. I highly recommend you check it out!

But when I saw Hefeweizen Cupcakes, I knew I had to make them!!

It took awhile to actually get around to it. And I had a Franziskaner Hefe-Weisse in the fridge that was off-limits, for what probably seemed like FOREVER to Jon!

But our friend's birthday rolled around, and he ended up being in town without his lovely wife or family, so I decided it was the perfect occasion for Hefeweizen Cupcakes!

Photobucket

Hefeweizen Cupcakes
Makes 9 cupcakes

2 egg whites
1/2 C sugar
1/2 tsp baking powder
1/4 tsp baking soda
1/4 C vegetable oil
zest of one large lemon or 2 small lemons
3 TBLS milk
1 C all-purpose flour
1/2 C Hefeweizen or other wheat beer

In a medium-sized mixing bowl, whip egg whites until soft peaks form.
Gradually mix in the sugar.
Mix in baking powder, baking soda, vegetable oil, zest, and milk.
Mix in half of the flour.
Mix in the beer.
Mix in the other half of the flour.
Fill cupcake liners 3/4 full.
Bake at 350F for 15 minutes or until cupcakes bounce back when lightly touched.

Beer Glaze Recipe
1/2 C malted milk powder
2 TBLS all-purpose flour
1/4 C hefeweizen or other wheat beer
4 TBLS unsalted butter, room temperature
1 1/4 C powdered sugar

In a double boiler, combine all the ingredients except for the butter and sugar.
Melt the mixture, stirring continuously until it's thick - about 12 minutes.
Cool completely.
In a medium-sized mixing bowl, mix the cooled malt mixture with the butter.
Mix in the powdered sugar.
The end result should be a thick and sticky glaze.
Spread onto cooled cupcakes.

~~~~~~~~~~~~~~~~~~~~~~~~~~

The beer that sat in my fridge forever!
Photobucket

Preheat your oven to 350F
Ok... so beat your egg whites until soft peaks form.
Photobucket

Then gradually mix in the sugar.
Mix in baking powder, baking soda, vegetable oil, zest, and milk.
Mix in half of the flour.
Mix in the beer.
Mix in the other half of the flour.

It will look like this =)
Photobucket

Fill cupcake liners 3/4 full.
Photobucket

Bake at 350F for 15 minutes or until they bounce back when lightly touched.
Photobucket

Now to make the Beer Glaze.

So malted milk powder, beer and flour in to the double boiler.
Photobucket

Mix well, cook and stir until thick.
Photobucket

About 12 minutes...
Photobucket

When completely cooled...

Mix the cooled malty mixture with the butter
Photobucket

Then mix in the powdered sugar...
Photobucket

Now you're ready to glaze the cupcakes!
Photobucket

Photobucket

Kinda yeasty and a little savory sweet. But not too sweet. I'm not fond of stuff that's really sweet and these were great!

Photobucket

Really tasty... nice crumb...

Photobucket

They ARE different.

But I'll definitely be making them again!

Give them try!

Friday, June 29, 2012

Twinkie Cake

I love Twinkies.

There! I said it!

I've loved Twinkies since I was in the first grade. If I close my eyes, I can almost taste my first Twinkie, sitting at my desk in Miss Grady's first grade classroom with my little carton of nice cold milk at snack time. Mmmmmm.....

So when I heard about Twinkie Cake, I thought, "OMG!! Cake made out of Twinkies?!?!? I must try this!" I'm sure some of you would have thought, "OMG... Cake made out of Twinkies?!?!? That sounds revolting!!"... but seriously... don't stop reading.... you really would never know there are Twinkies in this cake!

Photobucket

Twinkie Cake
1 box (of 10) Hostess Twinkies (9 for cake, 1 bonus Twinkie for you!!!)
4 large bananas, sliced
1 large can (20 oz) crushed pineapple, drained, but not pressed dry
1 large box Vanilla instant pudding, prepared
1 - 12 oz. container of Cool Whip
Maraschino cherries and chopped nuts for garnish

Remove Twinkies from wrappers.
Cut each in half lengthwise from top to bottom. Follow the dots!
Place Twinkie halves in 9 x 13 baking dish with cream side facing up.
Layer sliced bananas, pineapple, pudding, and Cool Whip over Twinkies.
Cover and refrigerate for several hours.
Garnish each serving with a maraschino cherry and chopped nuts.
Enjoy!!

~~~~~~~~~~~~~~~~~~~~~~~~~~~

Unwrap all the Twinkies, except one. Well... unless you want to eat your bonus Twinkie now. Then by all means, go ahead and open them all!

Now cut them in half. Follow the dotted line.
Photobucket

Place cut Twinkies, cream side up in a 13x9 pan.
Photobucket

Slather on the pudding. I used banana pudding instead of vanilla. =)
Photobucket

Drain the pineapple.
Photobucket

Spread that evenly over the pudding.
Photobucket

Make a nice layer of sliced bananas on top of the pineapple.
Photobucket

Now slather that with thawed Cool Whip.
Photobucket

Refrigerate for several hours.

Garnish each piece with a maraschino cherry and some chopped nuts.
Photobucket

This was so tasty!!! Jon said if he didn't know this was made with Twinkies, he would have never known. It just tastes like sponge cake. This is a quick to assemble, cool, yummy dessert that won't heat up your kitchen!

Enjoy!

Monday, October 24, 2011

Happy Birthday Chica... and a review...

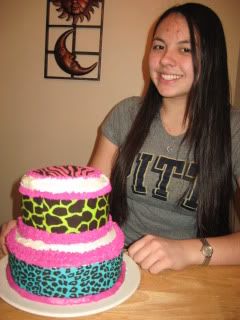
Today my baby girl is 19 years old! The time has certainly flown by. It seems like just yesterday she was born. It was the wee hours of the morning and I didn't sleep at all after her arrival. I couldn't take my eyes off of her. She was perfect. I had never known I could love someone so much, until that very moment.
Photobucket

I asked Tawny what kind of cake she wanted for her birthday this year. She requested an almond flavored cake, that was decorated with bright pink and bright lime green. That was actually the same cake she requested last year. But last year, I had a hard time tinting the frosting and instead of bright colors, ended up with something more suited to a baby shower. She gave me a do-over.

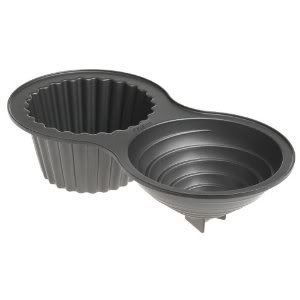
Even though she requested that cake, I knew she loved those big cupcake shaped cakes. You know the ones... they look like a big cupcake!

Anyway... I needed to buy a pan.

This pan.
Photobucket

I could only find this at Michael's, since I waited until the last minute to buy one... but they wanted $35 for it!!! I could buy it for $20 on Amazon... AND get free shipping. I was really bummed about such a big price difference. But I was shopping with my friend Erin, and this caught her eye!!
Photobucket

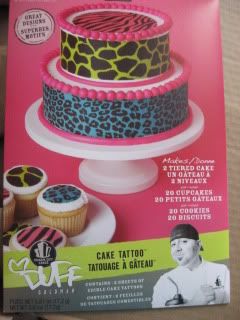
Edible Cake Tattoos??!!! And in fun brightly colored animal prints!!! Those would be PERFECT!!!

They're by Duff Goldman, the Ace of Cakes at Charm City Cakes.

Duff has a whole line of stuff to make cool cakes at home! He has loads of Buttercream Fondants, Fondant Cutters, all kinds of Decorating Icings and Gels and Flavored Sprinkles, plus lots of other cool cake stuff. The clerk at Michael's even said that Duff's buttercream fondant is totally yummy... unlike that Wilton fondant.

I would definitely be considered a cake novice and honestly, was a bit nervous that I couldn't make the cake look cool, even with step by step decorations. But I knew Tawny would think this cake was awesome... so I decided to give it try.

For this cake, I had to bake two 8 inch cakes and two 6 inch cakes.
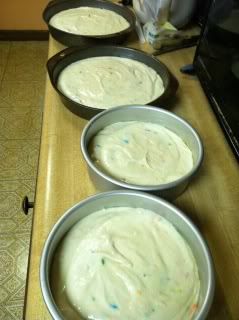
Photobucket

I opened the Edible Cake Tattoo package and this is what was inside.
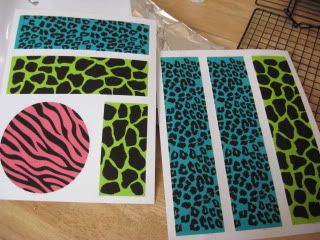
Photobucket

They almost looked like fabric strips.

Time to frost the cakes.

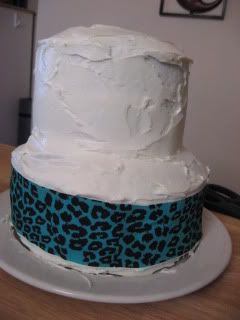
Remember, when it comes to cakes, I'm definitely a novice. This time, I decided the cakes were flat enough to just use as is... but the next time I try this, I'd definitely trim the cakes so they were flat. I did trim one of the 6 inch layers. But I was worried if I trimmed the cakes, I'd need to trim the tattoos and I wasn't sure if I'd end up just making a huge mess.

I definitely could have trimmed them, the tattoos would have fit and after working with them, I feel pretty confident I could have easily trimmed them, without making a mess, if needed.
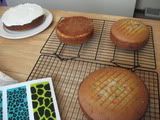
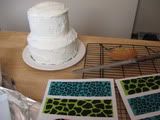
PhotobucketPhotobucket

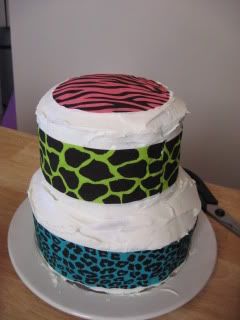
Place the tattoos on the cake.
Photobucket

They go on very easily. You do have to be gentle with them, because they will tear easily, but not so easily, if that makes sense.

There's a white border around each tattoo where the print ends. On white frosting, it totally blends in. But where the seams meet, you'll want to trim it down to the print, so you can't see the seams on the cake.

Tattoos applied!
Photobucket

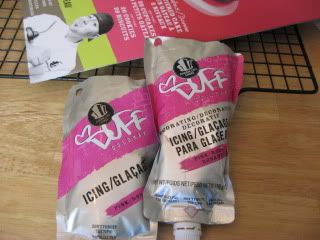
Time for decoration. I used Duff's Icing Pouches.
Photobucket

The consistency of these pouches was a little thinner than I would have liked. Also, it was impossible to get the first two or three inches of icing that came out of the pouch mixed. So you definitely don't want to start out directly on the cake.

Once I got the feel of it, it was ok. But I think next time, I'd make my own icing, so I could control the thickness. Actually... only if I can get those vivid colors. I have a REALLY hard time with that. Plus, with my own frosting, I could use a much wider variety of decorating tips. I have a pretty nice set of tips, but you can also get a pretty nice set from Duff!

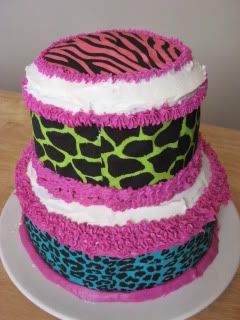
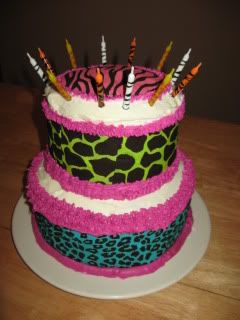
With my slightly rounded cakes... and trying to get the hang of the thinner than I like icing... this is what I ended up with.
Photobucket

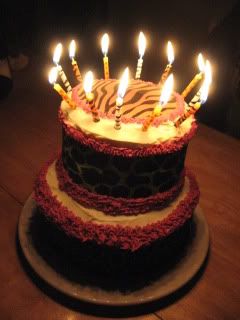
I think it's a pretty decent likeness... especially for someone who just doesn't have much experience with cake decorating.
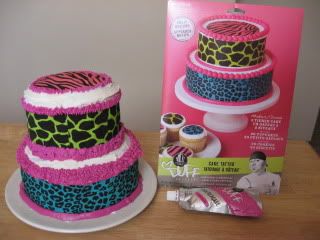
Photobucket

It's hard to tell in the picture... but those are zebra, tiger and giraffe candles. I found them over the summer and knew I would use them on Tawny's birthday cake. They just happened to fit in perfectly!
Photobucket

Photobucket

So how does all of this stuff taste you ask?

Not bad at all!

Well... I tried some of the extra tattoo when I trimmed it. By itself, it almost doesn't taste like anything. Everyone liked the pink icing from the icing pouch. I didn't try Duff's cake mix or butter cream icing.

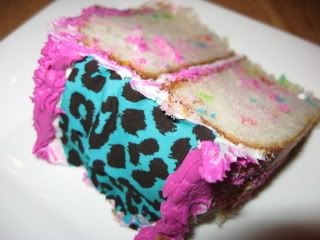
I was a little worried that while cutting the cake, the tattoos would kinda drag and pull, but they sliced perfectly. And when they adhere to the frosting, you really don't even notice any tattoo taste or texture. They kinda become part of the frosting. They're pretty cool!
Photobucket

I have to say I'm very excited about Duff's line of cake decorating products. Stay tuned for Spryte's Adventures in Fondant... coming to a computer screen near you...

As for you Tawny.

Happy Birthday bonita chica! You have grown into a lovely, talented, strong young woman, who is loved very very much. I'm so proud of you. I love you pretty girl!! Happy Birthday!! Love, Mom ♥

Tuesday, March 1, 2011

Chocolate Guinness Cake with Bailey's Irish Cream Frosting

I've been wanting to make more cakes from scratch. Jon likes cakes from a box mix. They are his preference. So when there's an 'occasion' I typically make what he requests.

But we had friends over for dinner this past weekend and it just happened to be Drew's birthday. So I decided to make them my cake guinea pigs. Actually, there really is no shortage of volunteers for this position, but it's easier when they come to my house.

With St Patrick's Day coming up, I went with the Guinness Stout Chocolate Cake and frosted it with Bailey's Irish Cream Frosting.

This is a Nigella Lawson recipe. I used a different frosting than the one included with the recipe, so I've left out that part. The Bailey's Irish Cream Frosting recipe is from Food.com

Photobucket

Chocolate Guinness Cake
1 cup Guinness stout
10 tablespoons unsalted butter
3/8 cup unsweetened cocoa
2 cups superfine sugar (I used granulated)
3/8 cup sour cream
2 large eggs
1 tablespoon vanilla extract
2 cups all-purpose flour
2 1/2 teaspoons baking soda

Preheat oven to 350F
Pour the Guinness into a large sauce pan. Add butter and heat until melted. Whisk in cocoa and sugar. In a small bowl, whisk together eggs, sour cream and vanilla. Add to sauce pan and mix well. Add flour and baking soda and whisk until smooth.
Pour into a greased, parchment paper lined 9 in springform pan. Bake for 45 - 60 minutes. Cool completely in pan on rack.
Move to cake plate and top with Bailey's Irish Cream Frosting.

Bailey's Irish Cream Frosting
8 oz cream cheese, room temperature
4 TBLS butter, room temperature
3 cups powdered sugar
3 - 4 TBLS Bailey's Irish Cream

In a medium bowl, blend together cream cheese, butter, and Bailey's. Gradually add powdered sugar, mixing well until it's all incorporated. Use immediately.

~~~~~~~~~~~~~~~~~~~~~~~~~

First you need some Guinness. Jon doesn't care for Guinness, so it's not something we keep on hand. We picked this one up at Smokin' Joe's.
Photobucket

Even though he doesn't care for Guinness, he took one for the team and finished it for me, since I only needed a cup.

Pour one cup of Guinness into a large sauce pan with the butter. Heat until butter is melted.
Photobucket

Turn off heat when butter is melted.

Whisk in cocoa
Photobucket

I used Dutch Process Cocoa from Penzey's.

And sugar
Photobucket

I didn't have superfine sugar, so I used granulated. It seemed to work out fine.

Whisk together eggs, sour cream & vanilla
Photobucket
Photobucket

Whisk that into the chocolate stout mixture
Photobucket

Then whisk in the flour and baking soda until smooth
Photobucket
Photobucket

Line a 9 in springform pan with parchment paper and butter the sides
Photobucket

Pour cake batter into prepared pan
Photobucket

Bake at 350F for 45 - 60 minutes

Cool in pan on wire rack until completely cooled
Photobucket

No worries about the grand canyon around the edge, it will get covered with frosting.

Move to cake plate and top with Bailey's Irish Cream Frosting.

Photobucket

If you look at the two previous pictures, you'll notice that the middle of the cake has sunk a bit. It probably could have cooked a few more minutes, but the pick came out dry, so I took it out. I'm pretty new to this cake from scratch thing.

Anyway...

A few tablespoons of Bailey's from a mini and you still have a little left for later.
Photobucket

Beat butter, cream cheese & Bailey's until well combined. Beat in powdered sugar.
Photobucket

Top the cake with a generous covering of the frosting.
Photobucket

I have to say... this frosting is amazingly delicious!
LOVE LOVE LOVED IT!

Photobucket

So the middle definitely could have been done more.
Photobucket

I typically don't care for chocolate, but I had a small piece and it's delicious!

You get just a hint of the stout flavor.

Very thick, rich, moist decadent cake.

I really can't recommend it enough. Everyone really loved it!