Friday, December 24, 2010

Gingerbread Houses

Gingerbread Houses have become a family tradition for me. Most of my family started doing them many years before I did, because I moved across the country when I was 20 and totally missed out on the beginnings of it!

This is a long one... grab a cup of cocoa get cozy!


It started out with my Auntie Mary. My sister used to work Sunday mornings at the local coffee shop. While she was working, my Auntie Mary would watch my nephew Damien. If you're a long time reader of my blog, you met Damien back in my Chilaquiles post.

Anyway... Damien spent Sunday mornings with Auntie Mary and Uncle Joe, and with my cousins Annie and Frank, who are a few years older than him.

One Sunday morning, Auntie Mary thought it would be nice to bake cookies with the kids. Definitely not anything unusual for Auntie Mary. But on this particular Sunday, she decided it might be fun to make a gingerbread house for the kids to decorate.

And so there begins the tradition!

She made the first gingerbread house for the kids to decorate. Apparently, it was a success, because she's been doing it every year since!

She started inviting other little cousins over and it grew and grew until she was making more than 50 gingerbread houses a year!

She also started making a gingerbread manger every year for my grandmother; and my cousin Annie always goes all out on her house making it part of a big winter wonderland scene!

Anyway... when I moved back to Massachusetts, she invited me to bring Tawny and Bobby over to decorate and we were totally hooked!

I love to decorate houses with Auntie Mary whenever I'm in MA. But now I also do them with my kids and our friends and their kids too!

First... you need gingerbread houses.

This is Auntie Mary with a few houses she made!


She uses the Wilton Gingerbread Recipe.

Grandma's Gingerbread Recipe
5 to 5 1/2 cups all-purpose flour
1 teaspoon baking soda
1 teaspoon salt
2 teaspoons powdered ginger
2 teaspoons ground cinnamon
1 teaspoon ground nutmeg
1 teaspoon ground cloves
1 cup solid vegetable shortening
1 cup granulated sugar
1 1/4 cups unsulphured molasses
2 eggs, beaten

Preheat oven 375°F. Thoroughly mix flour, baking soda, salt and spices. Melt shortening in large saucepan. Cool slightly. Add sugar, molasses and eggs; mix well. Add four cups of the dry ingredients and mix again.

Turn mixture onto lightly floured surface. Knead in remaining dry ingredients by hand. Add a little more flour, if necessary, to make the dough firm. Roll out on a lightly floured surface to a 1/4 inch thickness and cut out house pieces with Wilton Gingerbread House cutters or with the attached templates

Bake 6-10 minutes for small to medium size cookies and 10-15 minutes for large cookies.

If you're not going to use your gingerbread right away, wrap dough in plastic and refrigerate. Refrigerated dough will keep for a week, but be sure to remove it 3 hours prior to rolling so it softens and is workable.

Royal Icing - to assemble houses and for decorating
3 level tablespoons Meringue Powder
4 cups sifted confectioners' sugar (approx. 1 lb.)
6 tablespoons water

Beat all ingredients at low speed for 7-10 minutes (10-12 minutes at high speed for portable mixer) until icing forms peaks.

Yields 3 cups of icing.

~~~~~~~~~~~~~~~~~~~~~~~~

I've only made them from scratch once. I have to say, I get intimidated working with dough... but once I get started, I always wonder what I was worried about!

Thoroughly mix flour, baking soda, salt and spices.


Melt shortening in a saucepan.


Add sugar, molasses and eggs; mix well.


Add four cups of the dry ingredients and mix again.


Turn mixture onto lightly floured surface. Knead in remaining dry ingredients by hand.


I cut the dough into sections and wrapped it, so it didn't dry out while I was cutting.


On a floured surface, roll out the dough to 1/4 inch thickness


I cut templates from a thin plastic cutting board to use as cutting guides.

Click Here for template to roof and sides.

Roof is the rectangular piece. Side is the square piece.

Click Here for template to front/back.

You can cut your own house pieces free hand. You can use the Wilton cutters too. The Wilton cutters do make a bigger house so you will get fewer houses per recipe.

Cut out your pieces.

You will need two of each shape for one house.


Bake at 375F for 10-15 minutes.


Cool on racks.

I cooled them overnight so they had a chance to harden up a bit before assembling the houses.


I had some extra dough... so there are a few cookies too!

Now for assembly!!

This is MUCH easier with an extra pair of hands!

Make the royal icing and use it as glue to hold all of the pieces together. Try to wait about an hour before you put the roofs on. It gives your foundation a chance to harden.

Start with a strip of icing on the bottom of a front/back piece and attach it to your base. I used heavy paper plates for bases this time.


Apply icing to the side and bottom edge of a side piece and attach it to the front/back piece.


Now attached the other front/back piece.


Then the other side.


Auntie Mary adds little candy canes to the corners. I did it when I made them from scratch... but this year I was very short on time... so I cheated and used kits. That only cuts out the baking. You still have to assemble. But I left out the candy canes this year.


I like them both ways... but the candy canes don't really fit the kit pieces.

Some pieces might need to be trimmed at bit to fit together better.


Put together all the bases... then you can start adding roofs.


Not bad for a first time! (don't mind the miscellaneous condiments)


That's the batch I made from scratch last year.

And these I assembled from kits this year.


Now invite your friends and family. Have everyone bring candies to share for decorations... and let the fun begin!!

These are random shots of gingerbread house decorating at my sister's house with Auntie Mary and with my family and friends at my house.


Gingerbread houses make memories that last a lifetime!

Thank you Auntie Mary! I love you!

Merry Christmas everyone!

Tuesday, December 7, 2010

Bacon Chocolate Chunk Cookies!

Yup... I said Bacon Chocolate Chunk Cookies!

This recipe showed up on my Facebook news feed from The Cooking Channel last week. As soon as I saw it I knew I had to make them! Jon wasn't quite as excited as me, but he definitely wanted to try them!

Photobucket

Bacon Chocolate Chunk Cookies
12 oz bacon, cut into 1/4-inch pieces
2 1/2 C all-purpose flour
1 tsp baking soda
1 tsp salt
1/4 tsp baking powder
1/2 C unsalted butter, softened
1/2 C reserved bacon fat, chilled
3/4 C granulated sugar
1/2 C packed light brown sugar
1/4 C packed dark brown sugar
2 TBLS bourbon liquor
1 tsp vanilla extract
2 large eggs
8 ounces dark chocolate 65-percent or higher cocoa content, chopped into small pieces

In a large pan, cook the diced bacon until the bacon pieces are golden and crisp. Remove the bacon pieces from the fat and drain on a paper towel. Strain the fat through a fine sieve and measure out a 1/2 cup bacon fat and chill the bacon fat until it congeals and is set.

Preheat the oven to 375F.

Combine the flour, baking soda, salt, and baking powder in a small bowl. Beat the butter, chilled bacon fat, granulated sugar, light sugar, dark brown sugar, bourbon, and vanilla, in a large mixer bowl, until it is well combined.

Add the eggs one at a time, beating well after each addition; gradually beat in the flour mixture. Stir in the cooked bacon pieces and chopped chocolate bits. Drop by rounded tablespoon onto parchment-lined baking sheets at least 3-inches apart.

Bake in the oven for 9 to 11 minutes or until golden brown. Let stand for 2 minutes; remove to wire racks to cool completely. Keep in a dry, airtight container for up to 5 days.

~~~~~~~~~~~~~~~~~~~~~~~~~~~~

A few notes. I had drippings from 2 pounds of bacon chillin' in the fridge when I first read this recipe. So I knew I'd be making it very soon. When I cooked the 3/4 of a pound that the recipe calls for, I definitely didn't have 1/2 cup of drippings from it. It might have been close, I didn't measure, but I'm sure it would have come up short. So if you're gonna make these... have a some bacon with breakfast... then maybe make some BLTs for lunch... then fry up the bacon for the cookies... just to be sure you have enough fat. *shudder* Is sounds so gross when you call it fat instead of drippings! But FAT is definitely what it is!! If you spill some on your recipe, it becomes see-through and a little slippery! These are definitely ~not~ heart-healthy cookies. But they are definitely cool every once in a while!

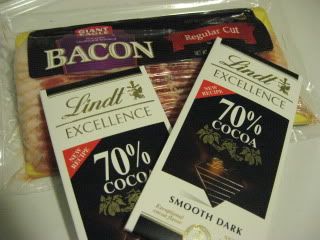
The starring ingredients for these cookies, ladies & gentlemen, I give you Bacon & Chocolate!
Photobucket

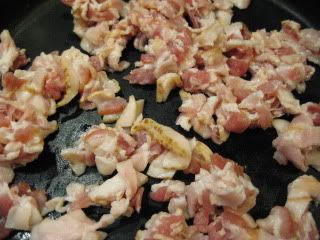
Dice up your bacon and get it into the frying pan.
Photobucket

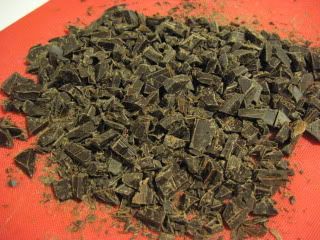
Chop up that chocolate and set it aside.
Photobucket

I only used 7oz of chocolate because those bars were 3.5oz each. But the cookies were definitely not lacking in chocolate flavor for the missing ounce.

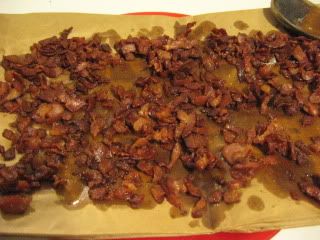
Drain your bacon pieces (and try not to eat them all)
Photobucket

I don't keep paper towels in the house... so I used a paper bag.

Whisk the flour, baking soda, salt, and baking powder in a small bowl and set aside.

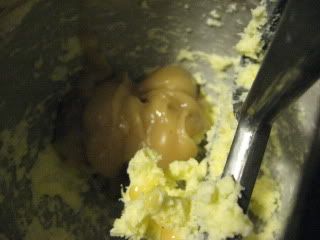
Cream together chilled bacon fat & butter.
Photobucket

Beat in sugars.

I didn't have any dark brown sugar, so I just added a little bit of molasses.

Beat in vanilla and bourbon

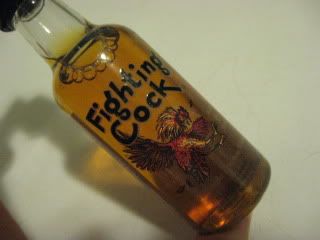
I used Fighting Cock Bourbon
Photobucket

I like to buy the little airline sized bottles of booze and usually pick them by if the bottle is cool... or if I like the name.

Fighting Cock... yeah... I'm immature... but I had 2 tablespoons of bourbon when I needed it! Plus 2 extra tablespoons that Jon sipped while I baked cookies!

Beat in eggs one a time.

Ugh... that left me with one egg from an 18-pack! I hate that! Now I have that big box in my fridge with one egg in it! At least we roll through eggs in my house. So it shouldn't be in there, takin' up all that space for long!

Ok... now gradually beat in flour mixture.

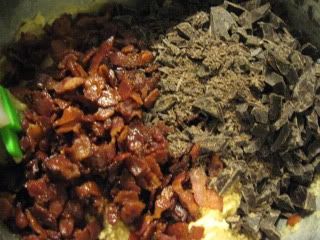
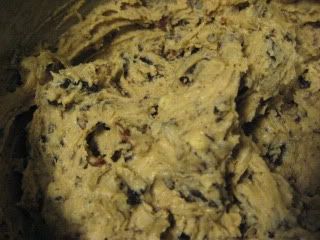
When that's well combined, stir in cooked bacon pieces and chocolate bits.
Photobucket

Photobucket

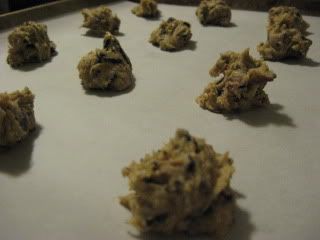
Now drop by spoonful onto parchment paper lined cookie sheets.
Photobucket

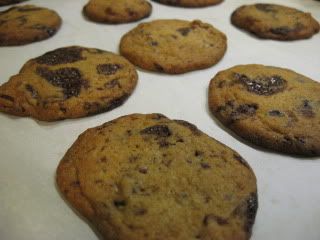
Now bake for 9 - 11 minutes or until golden brown.
Photobucket

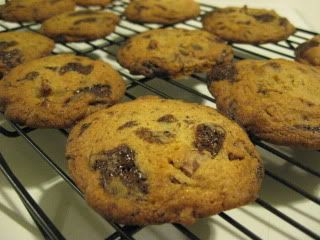
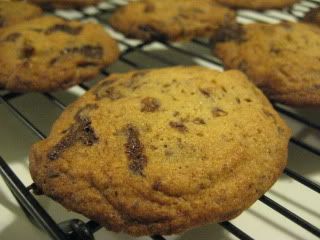
Cool on wire racks.
Photobucket

That's it!

So when you tell people you're making Bacon Chocolate Chunk Cookies the reaction seems to be either "Hell yeah!!" or "WHY would you do that???".

Jon and I tried them first.

My initial reaction was that they are too chocolatey. I really don't care for chocolate. But you totally get the bacon flavor. The bacon pieces are a little chewy, so it's kind of an odd texture thing, but not off-putting. At least not to me. I think I might have liked this cookie if it had craisins (dried cranberries) instead of chocolate. I also wished a little more of the bourbon flavor was in the baked cookie. It made the batter smell amazing!!

Jon thought they were interesting. But he did eat a few of them. So I guess not bad!

Lilly was one of the "WHY would you do that???" reactions and really didn't give the cookie a fair taste and didn't like it.

Bobby didn't like it. But he doesn't like dark chocolate, so I didn't expect him too.

Tawny & Ryan thought they were weird.

I brought some to work. My co-worker Bill says he's never met a cookie he didn't like. These didn't change that! He also brought some home for his kidlets to try. He gave them to two of kids without telling them what they were, but that there was a special ingredient in them. His teen daughter knew immediately bacon was the ingredient. Both liked them. His other teen daughter tried them after being told what was in them and didn't like them. Her boyfriend didn't even want to try them.

My boss George liked them. He said you could taste the bacon. My co-worker Ed was another one of the people with the "WHY would you do that???" reaction, but did give them a fair taste and didn't like them.

Jon also brought cookies to work. His co-workers, Jamez, Carrie and Matt all liked them. His boss Lester thought they were odd, but brought one home for his wife to try. She didn't like it. Jon's co-worker Linda LOVED them and brought some home to her husband who also LOVED them!

So it's really a split. But I guess you get that with any kind of cookie right?

If you love bacon and you love chocolate you should definitely try these! If nothing else, they are are interesting conversation starter!