I'd seen Bubble Pizza floating around the interwebs and it's been on my list of 'things to make' for a little while now.
I needed something to feed my pack of teens, plus Jon & me on Friday night. I also didn't want to spend a fortune on it. Then I remembered Bubble Pizza.
Bubble Pizza
2 (12 oz) cans refrigerated buttermilk biscuits
1 (14 oz) jar of pizza sauce (Or your own homemade pizza sauce)
1 lb ground Italian sausage, cooked & drained
1/4 lb sliced pepperoni
1/4 lb bacon, cooked drained & diced (microwave bacon is perfect for this)
1 1/2 - 2 C shredded mozzarella/provolone cheese blend
1 C shredded cheddar cheese
Preheat oven to 400F.
Grease a 13 x 9 baking dish.
Open canned biscuits and cut each uncooked biscuit into 4 pieces and put them into a large bowl. Toss with pizza sauce until well coated. Add sausage, pepperoni and bacon and mix well. Pour into greased baking dish. Top with shredded cheese.
Bake at 400F for 20 - 25 minutes.
Enjoy!
~~~~~~~~~~~~~~~~~~~
Cut up the biscuits in to quarters and place in a large bowl.
Add pizza sauce
Toss until well coated
Stir in the cooked sausage, bacon and pepperoni
Ok... that's not very pretty, but pour it into the greased baking dish and bake 20 - 25 minutes.
I missed the timer and this was a little more cooked than intended. But I like my pizza cooked well anyway!
I made the Meat Lovers version
And I made one with Pepperoni & Pepperonicinis
I'll be honest with you. The dinner reviews were kinda mixed. No one disliked it. I think one or two kids did like it. But everyone mostly thought it was just ok. I was a little disappointed, because it sounded like a fun easy dinner. And it DOES feed a lot! I doubled the recipe to make two different kinds, but we had about a full pan left, between the two of them. And my crew can really roll through pizza! So this really does feed a lot. One pan will definitely satisfy 4 teens & 2 adults.
But the good news is, it's an awesome room temperature leftover! So much tastier that way!
If I knew I had a swarm of hungry teens descending on the house later, this is definitely something I'd make ahead and cut into squares for their arrival.
So there ya go. Not a fail... and it made a very nice comeback as a leftover!
Monday, February 28, 2011
Thursday, February 24, 2011
Finally ~ A Recipe Index!
It's taken me a couple of weeks, but I finally finished putting together a Recipe Index for Spryte's Place!
No offense blogger, but the tags & search that come with blogger, aren't really user friendly for the readers.
You can now click the Recipe Index button at the top of the right column.
Over there and up a little ~~>>
I hope that makes browsing Spryte's Place a little easier when you're looking for something specific.
Now I can get back to putting put recipes.
Enjoy!
Monday, February 14, 2011
Kidney Bean Relish
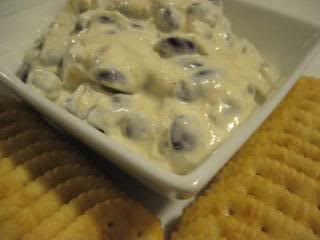
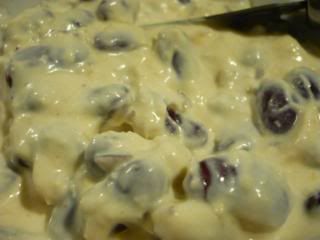
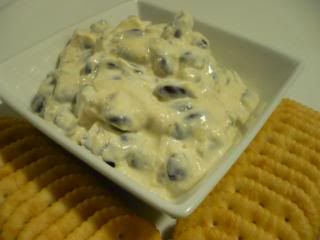
I was at my sister's house for Thanksgiving last year. On the appetizer table, I was surprised to see Kidney Bean Relish from Century House in Peabody, MA. I love that stuff! We get it every time we go there. Which is pretty often. I love the Mussels Margueray... the Steak Tips are great too... as is the Lobster Pie! Actually... I noticed online they are pretty well known for their breakfasts. I'll have to give that a try next time I'm in town! Anyway... they used to serve the Kidney Bean Relish with Crackers free, at every table. It's not free anymore, actually it's not even on the menu. But you can still order (and pay for) it, which we always do. But you can also buy it in their Epicurean Shoppe, which boasts, "delightful selection of our most delicious dishes, oven-ready to take home, lets you have a healthy home-style meal in less than a half hour!" If you've picked up the Kidney Bean Relish, it won't even take that long. You just have to remove the lid and enjoy. But since I no longer live anywhere near Peabody, I had to try to recreate it. And I think I have it pretty close!
Kidney Bean Relish
1 (16 oz) can kidney beans, drained & rinsed
1/2 C sour cream
2 TBLS red onion, finely chopped
2 TBLS thousand island dressing
1 TBLS +1 tsp prepared horseradish
1 small clove garlic, grated
2 shakes of Tabasco sauce
1 or 2 shakes worcestershire sauce
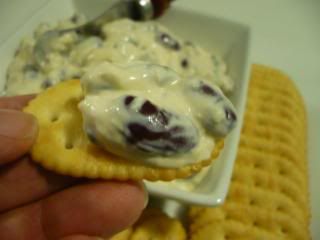
Combine all ingredients, gently so you don't crush the beans. Refrigerate several hours, overnight is best. Enjoy on buttery crackers.
That's it! So easy & tasty!
Friday, February 4, 2011
Press Drop Cookies (that's Spritz Cookies to the rest of the world)
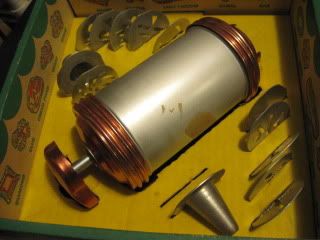
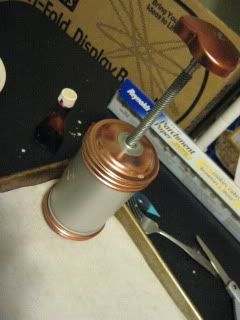
These are cookies that are made with a cookie press. I've had a few different styles of cookie press over the years, but I have to say my absolute favorite is the old style one my mom had. I ended up getting this beautiful tool on eBay a couple years ago.
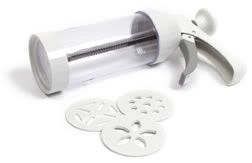
My first cookie press was the ratchet style.
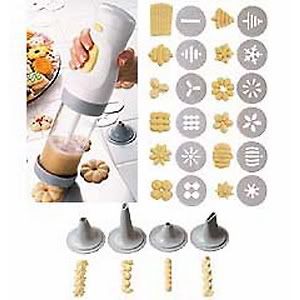
Then I had a couple of electric ones.
I hated the electric cookie press and to a lesser degree the ratchet style. The dough from the ratcheted press never seemed to come out at a consistent rate. The electric ones were even worse. I like the nice even turn of the screw from my vintage press.
Anyway... these cookies have been on Mum's Christmas Cookie trays for as long as I can remember. I know, you're saying, "Come on now Spryte, it's almost Valentine's Day." But really, even though I've only made these cookies at Christmas time, I'm going to make a concentrated effort to make them throughout the year this year!
The cookie discs are definitely usable for the whole year!
The only problem is I tend to forget which cookie discs I actually have. None of the discs from my previous presses are interchangeable and sometimes I end up looking for a disc from the past.
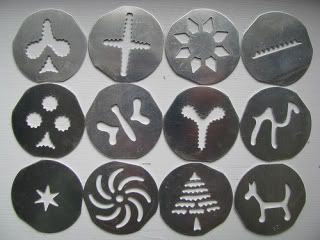
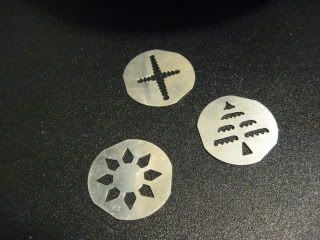
These are my current discs.
Of course there's the star for cheese straws and the little spikey line thing for bar cookies.
I have all the suites from a deck of cards. I could be making these every time we have friends over for an evening of cards & food.
The hearts and flowers would be great for Valentine's Day.
Butterflies & flowers are good all spring and summer, plus tea parties or bridal showers, or the Cookie Table at a wedding.
The dog, well.. maybe you could make some as a gift for your dog walker or vet... or those hard working people at the humane society.
The camel... hmmm... ummmmm... ok... I know! Hump Day! Everyone needs special cookies for Wednesday right?
I've been making these my whole life and I know this will sound dumb, but I only found out they were called Spritz Cookies within the past couple of years! Mum always called them Press Drop Cookies. So that's what I call them!
Press Drop Cookies
1 C shortening
3/4 C sugar
1 egg
1 tsp extract (almost is my favorite)
2 1/4 C flour
1/4 tsp baking powder
1/2 tsp salt
Preheat oven to 375F
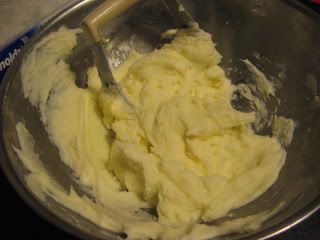
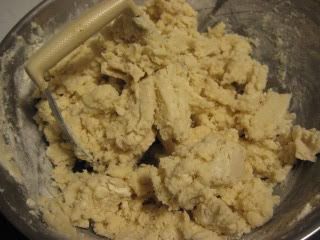
Cream together shortening, sugar, egg and extract. In a separate bowl, whisk together flour, baking powder and salt. Mix into shortening & sugar mixture until completely blended. I always color the dough. So when it's thoroughly mixed, add food coloring and mix until desired color is reached. Select a shape, load dough into barrel of cookie press. Press cookies out onto parchment paper lined baking sheets. Decorate with jimmies or colored sugars if desired. Bake at 375F for 7 - 10 minutes. Cool on racks.
~~~~~~~~~~~~~~~~~~~~~~~~~~~
So cream together shortening, sugar, egg and extract. I almost always use almond, but really, you can use whatever you like! Lemon, peppermint, rootbeer, coconut, butter... it's totally up to you... ya know... just typing this out kinda makes me wanna change it up a little next time!
Mix in the flour mixture.
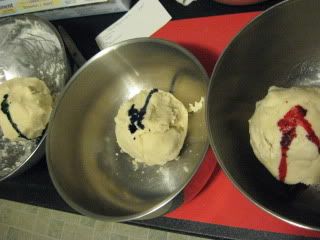
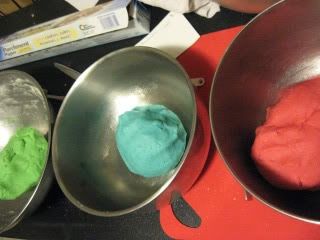
Time for color!
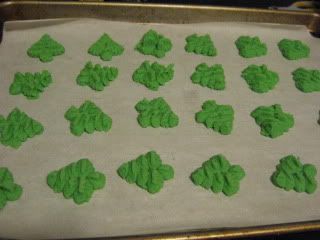
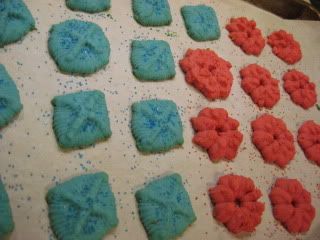
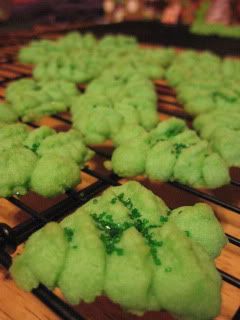
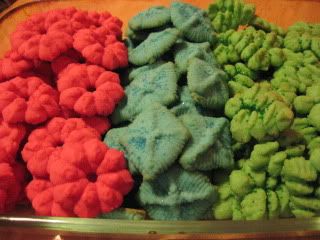
Green, Red & Blue
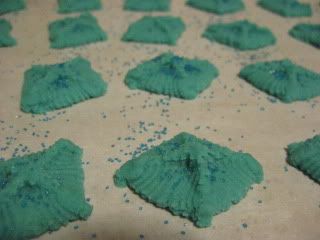
I was making Green for Christmas trees, Red for Poinsettias, and Blue for ummm.. for some reason I was thinking they were going to be Stars.. but they turned out to be diamonds... so Blue Diamonds! (aren't there Blue Diamonds in Lucky Charms?)
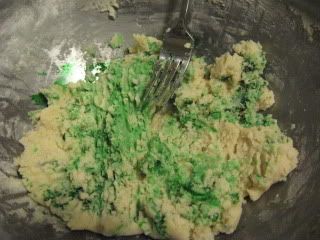
It takes a lot of mixing to get the colors worked through the dough.
But it does eventually get blended.
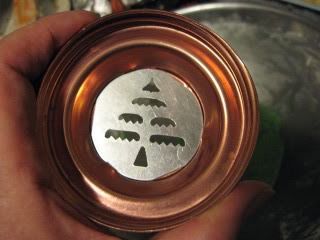
Insert your disc of choice.
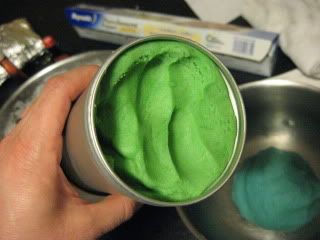
Load the barrel with the appropriately colored dough.
Screw down the press until dough is firmly packed in the barrel.
I find 1/3 of a turn to be the perfect amount for this dough.
You can sprinkle with sugars or jimmies or other decorations if you like.
Bake at 375F for 7 - 10 minutes and cool on racks.
Enjoy!
These are definitely one of my kids favorite cookies. They'll be pretty psyched to see them pop up throughout the year.
Hey! I just thought of another occasion for the diamond shaped cookie!!
Yellow, Red & Blue Diamonds...
Go Steelers!!
Thursday, February 3, 2011
Carrot Cake
This has been sitting in my big pile of things I need to post since September. But since today is National Carrot Cake Day, I decided I should dust it off and get it posted!
I'll start by saying, I'm not really a Carrot Cake fan. It's not something I'd typically select of my own volition. I might select a Carrot Cake Cupcake, if my only other choice was Chocolate. But it's just not really ever going to be one of my top choices.
I was trying to be all stealthy to find out my friend Erin's favorite kinda cake for her birthday. So I asked her husband, who in turn asked her and told me it was Carrot Cake. Heck, I coulda done that! Ok... so it ended up not being so stealthy, but at least I found out. I don't know if Jon would know my favorite cake either. Actually, since I mostly don't really care for cake, he'd probably come up with something like, "Is this a trick question??" Jon... what's my favorite cake?? Let's see what he says. And you can't ask if it's a trick question!
Anyway... I needed to find a Carrot Cake recipe for Erin. I asked my sister Jeannie and she provided me with her go-to Carrot Cake recipe. She thinks it's a McCall's Cooking School Recipe.
Carrot Cake
3 C flour
2 tsp baking powder
1 tsp baking soda
1 tsp ground cinnamon
1/2 tsp salt
1 lb carrots
1 C butter, softened
1 C light-brown sugar, packed
1 C granulated sugar
4 eggs
2 TBLS grated lemon peel
2 TBLS grated orange peel
2 TBLS lemon juice
2 TBLS orange juice
1 C walnuts, coarsely chopped
1 C seedless raisins (I'm pretty sure I left these out)
1 - 2 C walnuts, coarsely chopped (I added this to the stick to the frosting)
Lightly grease and flour two 8 inch cake pans. Whisk flour with baking powder, baking soda, cinnamon, and salt; set aside.
Wash and peel carrots; grate on medium grater, or use coarse blade of food processor. Should measure 4 cups.
Preheat oven to 350F.
In large bowl of mixer, at high speed, beat butter and brown and granulated sugars, occasionally scraping side of bowl with rubber scraper, until light and fluffy, about 4 minutes. Add eggs, one at a time; beat well after each addition until smooth and light.
In measuring cup, combine lemon and orange peels and juices. At low speed, beat in flour mixture, in fourths, alternately with lemon-orange mixture, in thirds, beginning and ending with flour mixture. Beat just until smooth, about 1 minute.
With wooden spoon, stir in grated carrot, 1 cup of nuts and raisins, mix well. Turn into prepared cake pans; spread evenly. Bake 50 - 60 minutes, or until a cake tester inserted in center of cake comes out clean. Cool in pans on wire rack 20 minutes, to cool slightly.
Gently loosen edge of cake with a spatula. Turn out of pans onto a rack. When cakes are completely cooled, frost layers of cake with cream cheese frosting. Press chopped walnuts around sides of cake.
Cream Cheese Frosting from allrecipes.com
2 (8 ounce) pkg cream cheese, softened
1/2 C butter, softened
2 C sifted confectioners' sugar
1 tsp vanilla extract
In a medium bowl, cream together the cream cheese and butter until creamy. Mix in the vanilla, then gradually stir in the confectioners' sugar.
~~~~~~~~~~~~~~~~~~~~~
Whisk flour, baking powder, baking soda, cinnamon, and salt.
Wash and peel carrots; grate on medium grater, or use coarse blade of food processor. Should measure 4 cups.
In measuring cup, combine lemon and orange peels and juices.
In large bowl of mixer, at high speed, beat butter and brown and granulated sugars
I totally wish my mixer had a dome light
Add eggs, one at a time; beat well after each addition until smooth and light.
Now alternate adding the flour mixture then the juice mixture until it's all mixed in.
Add the carrots, 1 cup of nuts and raisins, if you used raisins.
Pour into greased cake pans; spread evenly
Bake 50 - 60 minutes at 350F or until pick comes out clean
Cool on racks.
Mine did stick a little, but this moist cake stuck back together nicely.
Whip up the cream cheese frosting.
When cakes are completely cooled, frost with Cream Cheese Frosting.
Not very pretty is it?
That's why I decided to chop up a couple more cups of walnuts to stick to the sides of the cake!
Voila!
A gazillion times better!
This was definitely a moist and tasty cake. The texture was excellent. But it was a very citrusy cake. Obviously right? With all that lemon & orange zest & juice! Even though I almost never eat Carrot Cake, when I think of it, I think of a spicy cake... lots of cinnamon, nutmeg, ginger, I dunno, more spices. This cake definitely didn't have it. But it was still a delicious cake. Just not really what I was thinking when I thought about Carrot Cake.
Now the frosting... WOW!!! LOVE LOVE LOVED the frosting. It wasn't wicked sweet. It was more cheesy like cheesecake! Sooooo yummy!!!
Today is National Carrot Cake Day! Wanna change it up from the spicy kinda Carrot Cake... or all those Carrot Cakes that have pineapple in them? Give this one a try! All that citrus really brightens up a dark cold winter day!