Since I made Ginger Cookies the other day and Jon really doesn't like spice cookies, I decided to make something he'd really like.
I was thinking peanut butter cookies, maybe with some mini chocolate chips. Then one of my co-workers brought in some leftover Halloween candy and there were a couple of Butterfingers in the mix. I thought they might be good chopped up in the cookies. They'd be a little less chocolatey than mini chocolate chips and of course add some more crispity crunchity peanut butter flavor. So I stopped to pick up a bag of fun-sized Butterfingers on my way home.
Peanut Butter Butterfinger Cookies (printable recipe)
2-1/2 C flour
1 tsp. baking powder
1 tsp. baking soda
1/4 tsp. salt
1 C creamy peanut butter
1 C butter, softened
1 C granulated sugar
1 C firmly packed brown sugar
2 eggs
1 tsp. vanilla extract
1 dozen fun-sized Butterfingers, chopped
Preheat oven to 350F.
In a medium bowl, whisk together flour, baking powder, baking soda and salt in small bowl; set aside.
Beat peanut butter and butter in large bowl until smooth.
Beat in sugars, then eggs and vanilla until blended.
Beat in flour mixture just until blended.
Fold in chopped Butterfingers.
Drop by heaping spoonful onto parchment paper lined cookie sheet, 2 in apart.
Bake 10 minutes until edges are golden brown.
Cool on wire rack.
Enjoy!
Tuesday, November 25, 2008
Ginger Cookies
I stumbled onto Bakingblonde's Weblog when Bob over at Cooking Stuff tagged me. (Bob, I'll try to get tagging!)
Anyway... Her Chewy Ginger Cookies with Cinnamon Chips recipe was at the top of the first page. I had recently been experimenting with cinnamon chips with marginal results at best, so I checked out her Ginger Cookies recipe.
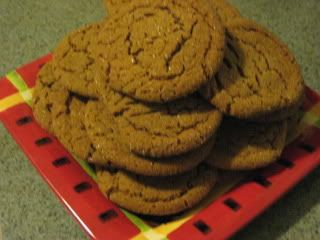
My husband doesn't care for any kind of spice cookie. But since I don't really care for chocolate... I really wanted to give these a try! (my turn!) I am SO glad I did! These cookies got rave reviews from all who tried them! (my kids, the guys at the office, friends visiting over the weekend)
I'll definitely be making these cookies again!
Ginger Cookies
from Better Homes and Gardens (printable recipe)
4 1/2 cups flour
4 tsp ground ginger
2 tsp baking soda
1/4 tsp salt
1 1/2 tsp ground cinnamon
1 tsp ground cloves
1 1/2 cups shortening (I used butter flavored)
2 cups sugar
2 eggs
1/2 cup molasses
3/4 cup sugar for rolling
Preheat oven to 350F
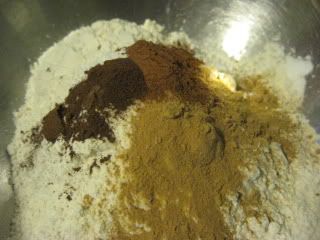
In large mixing bowl whisk together: flour, baking soda, ginger, salt, cinnamon and cloves. Set aside.
In mixing bowl beat shortening for 30 seconds. Add sugar and beat until well combined. Beat in eggs and molasses until combined, scraping sides of bowl as needed. Add as much of the flour mixture as your mixer can handle and fold in the rest by hand. (my KitchenAid handled the whole job nicely)
Shape dough into 2-inch balls. Roll balls in the 3/4 cup coarse or granulated sugar. Place about 2-1/2 inches apart on a parchment paper lined cookie sheet.
Press dough balls slightly to flatten for more even baking.
Bake for 10-12 minutes or until bottoms are LIGHLTY brown and tops are puffed. Do NOT overbake. Cool on cookie sheet for 2 minutes and finish cooling on wire rack.
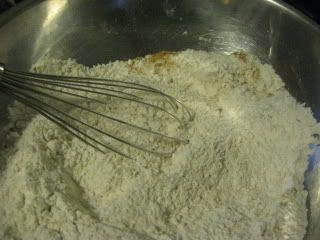
In large mixing bowl whisk together: flour, baking soda, ginger, salt, cinnamon and cloves. Set aside.
In mixing bowl beat shortening for 30 seconds.
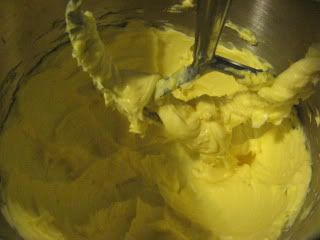
Add sugar and beat until well combined. Beat in eggs and molasses until combined, scraping sides of bowl as needed.
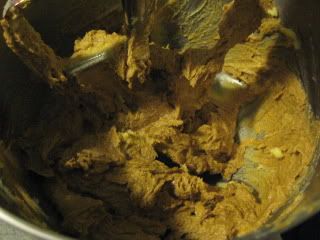
Add as much of the flour mixture as your mixer can handle and fold in the rest by hand. (my KitchenAid handled the whole job nicely)
Shape dough into 2-inch balls. Roll balls in the 3/4 cup coarse or granulated sugar.
Place about 2-1/2 inches apart on a parchment paper lined cookie sheet.
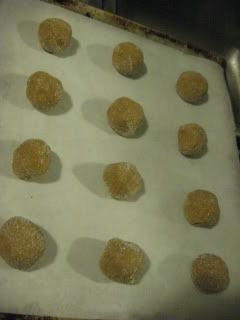
Press dough balls slightly to flatten for more even baking. (I used the bottom of a glass)
Bake for 10-12 minutes or until bottoms are LIGHLTY brown and tops are puffed. Do NOT overbake. Cool on cookie sheet for 2 minutes and finish cooling on wire rack.
Enjoy!
Anyway... Her Chewy Ginger Cookies with Cinnamon Chips recipe was at the top of the first page. I had recently been experimenting with cinnamon chips with marginal results at best, so I checked out her Ginger Cookies recipe.
My husband doesn't care for any kind of spice cookie. But since I don't really care for chocolate... I really wanted to give these a try! (my turn!) I am SO glad I did! These cookies got rave reviews from all who tried them! (my kids, the guys at the office, friends visiting over the weekend)
I'll definitely be making these cookies again!
Ginger Cookies
from Better Homes and Gardens (printable recipe)
4 1/2 cups flour
4 tsp ground ginger
2 tsp baking soda
1/4 tsp salt
1 1/2 tsp ground cinnamon
1 tsp ground cloves
1 1/2 cups shortening (I used butter flavored)
2 cups sugar
2 eggs
1/2 cup molasses
3/4 cup sugar for rolling
Preheat oven to 350F
In large mixing bowl whisk together: flour, baking soda, ginger, salt, cinnamon and cloves. Set aside.
In mixing bowl beat shortening for 30 seconds. Add sugar and beat until well combined. Beat in eggs and molasses until combined, scraping sides of bowl as needed. Add as much of the flour mixture as your mixer can handle and fold in the rest by hand. (my KitchenAid handled the whole job nicely)
Shape dough into 2-inch balls. Roll balls in the 3/4 cup coarse or granulated sugar. Place about 2-1/2 inches apart on a parchment paper lined cookie sheet.
Press dough balls slightly to flatten for more even baking.
Bake for 10-12 minutes or until bottoms are LIGHLTY brown and tops are puffed. Do NOT overbake. Cool on cookie sheet for 2 minutes and finish cooling on wire rack.
~~~~~~~~~~~~~
In large mixing bowl whisk together: flour, baking soda, ginger, salt, cinnamon and cloves. Set aside.
In mixing bowl beat shortening for 30 seconds.
Add sugar and beat until well combined. Beat in eggs and molasses until combined, scraping sides of bowl as needed.
Add as much of the flour mixture as your mixer can handle and fold in the rest by hand. (my KitchenAid handled the whole job nicely)
Shape dough into 2-inch balls. Roll balls in the 3/4 cup coarse or granulated sugar.
Place about 2-1/2 inches apart on a parchment paper lined cookie sheet.
Press dough balls slightly to flatten for more even baking. (I used the bottom of a glass)
Bake for 10-12 minutes or until bottoms are LIGHLTY brown and tops are puffed. Do NOT overbake. Cool on cookie sheet for 2 minutes and finish cooling on wire rack.
Enjoy!
Wednesday, November 19, 2008
Miso Ginger Chicken
This is adapted from a Bobby Flay Salmon recipe. Everyone at my house really likes it. I've also made it with tilapia and we like that too!
Miso Ginger Chicken (printable recipe)
2 - 3 lbs boneless skinless chicken breasts
1/4 C miso
1/4 C mirin
2 TBLS rice vinegar
3 TBLS green onions, chopped
2 inch ginger root, grated
2 tsp sesame oil
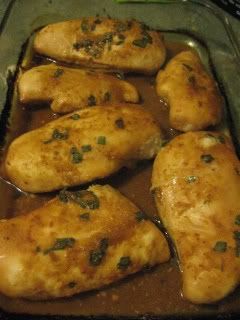
Whisk together all ingredient in a medium bowl. I used my 2.25 qt FoodSaver marinator. Add chicken breasts and toss until all are well coated. I covered and vacuum sealed the container. But you can just cover and put it into the fridge for about 30 minutes.
Bake at 350F until breasts get to 165 degrees, approx 20 minutes.
Ready to serve with your favorite sides!
Here's what you'll need.
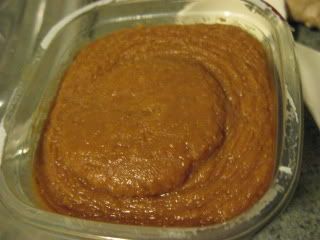
This is what the miso looks like.
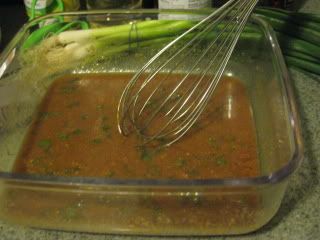
Whisk everything except the chicken in a medium bowl.
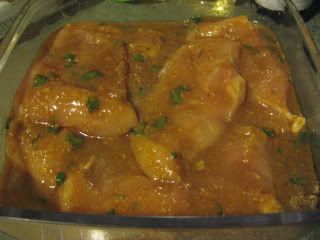
Add chicken and toss until all pieces are well coated.
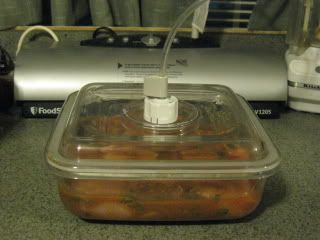
I used a FoodSaver container because I like to vacuum seal meats in marinades.
Vacuum seal and marinate in fridge for 30 minutes.
You can also just cover your bowl and let it marinate in the fridge without vacuum sealing. It's all good. =)
Preheat oven to 350F.
After 30 minutes, put the chicken and marinade into a baking dish and bake until chicken is cooked through and juices run clear (165F internal temp) approximately 20 - 25 minutes.
Out of the oven!
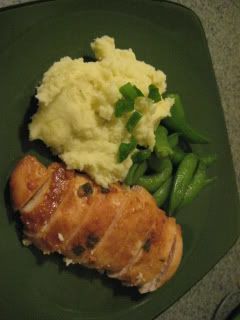
I served it with Wasabi Mashed Potatoes & Sugar Snap Peas.
Try it will Asian Broccoli Slaw or Fried Rice!
Enjoy!
Miso Ginger Chicken (printable recipe)
2 - 3 lbs boneless skinless chicken breasts
1/4 C miso
1/4 C mirin
2 TBLS rice vinegar
3 TBLS green onions, chopped
2 inch ginger root, grated
2 tsp sesame oil
Whisk together all ingredient in a medium bowl. I used my 2.25 qt FoodSaver marinator. Add chicken breasts and toss until all are well coated. I covered and vacuum sealed the container. But you can just cover and put it into the fridge for about 30 minutes.
Bake at 350F until breasts get to 165 degrees, approx 20 minutes.
Ready to serve with your favorite sides!
~~~~~~~~~~~~~
Here's what you'll need.
This is what the miso looks like.
Whisk everything except the chicken in a medium bowl.
Add chicken and toss until all pieces are well coated.
I used a FoodSaver container because I like to vacuum seal meats in marinades.
Vacuum seal and marinate in fridge for 30 minutes.
You can also just cover your bowl and let it marinate in the fridge without vacuum sealing. It's all good. =)
Preheat oven to 350F.
After 30 minutes, put the chicken and marinade into a baking dish and bake until chicken is cooked through and juices run clear (165F internal temp) approximately 20 - 25 minutes.
Out of the oven!
I served it with Wasabi Mashed Potatoes & Sugar Snap Peas.
Try it will Asian Broccoli Slaw or Fried Rice!
Enjoy!
Wasabi Mashed Potatoes
I needed a side dish to go with Miso Ginger Chicken last night and decided to try my hand at Wasabi Mashed Potatoes.
They were good... but I think they could have used more garlic flavor. But this is what I did last night!
Wasabi Mashed Potatoes (printable recipe)
3 lbs Yukon Gold Potatoes (my favorite for mashies)
1 C evaporated milk
1/2 C butter
4 cloves of garlic, smacked
1 Tbls Wasabi paste
2 tsp sesame oil
salt & pepper
green onions
Peel & cut potatoes and boil until tender.
Meanwhile, in a small sauce pan, combine evaporated milk, butter and smacked garlic. (smacked garlic is just peeled then smacked with the flat side of knife... bigger chunks than a rough chop)
Heat on low heat until butter is melted and hot. Don't boil it.
I usually prefer 'mashed' potatoes... but this time I used my hand mixer, for extra smooth creaminess.
Drain cooked potatoes.
Strain garlic out of milk & butter.
Pour milk & butter into potatoes and whip with hand mixer.
Add in sesame oil, wasabi and salt & pepper to taste.
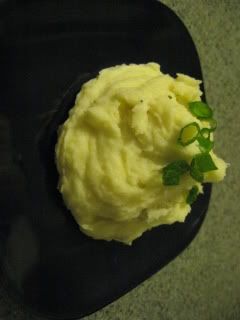
Garnish with green onions.
Enjoy!
Here's what you need.
Peel, cut and boil your potatoes until tender.
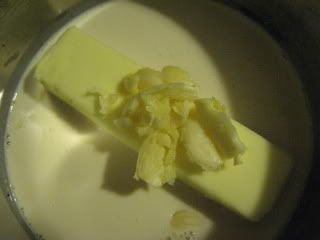
While they're cooking, in a small saucepan, combine evaporated milk, butter and garlic. Heat through, but don't boil.
When your potatoes are cooked drain them. Then strain the garlic out of the milk and butter. (Next time I might just squeeze a head or two of roasted garlic into the potatoes... they could have been more garlicky)
Pour hot milk & butter into potatoes and mash.
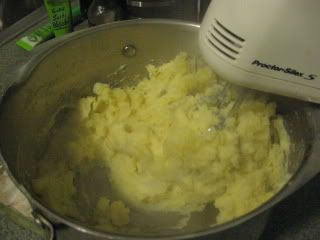
I used my hand mixer for this. I do usually like my mashed potatoes a little lumpy... but since I was trying something new, I figured I'd go creamy this time.
Add wasabi paste, sesame oil and salt and pepper to taste.
Mix well.
Garnish with green onions.
It's ready to co-star with your favorite meat!
Enjoy!
They were good... but I think they could have used more garlic flavor. But this is what I did last night!
Wasabi Mashed Potatoes (printable recipe)
3 lbs Yukon Gold Potatoes (my favorite for mashies)
1 C evaporated milk
1/2 C butter
4 cloves of garlic, smacked
1 Tbls Wasabi paste
2 tsp sesame oil
salt & pepper
green onions
Peel & cut potatoes and boil until tender.
Meanwhile, in a small sauce pan, combine evaporated milk, butter and smacked garlic. (smacked garlic is just peeled then smacked with the flat side of knife... bigger chunks than a rough chop)
Heat on low heat until butter is melted and hot. Don't boil it.
I usually prefer 'mashed' potatoes... but this time I used my hand mixer, for extra smooth creaminess.
Drain cooked potatoes.
Strain garlic out of milk & butter.
Pour milk & butter into potatoes and whip with hand mixer.
Add in sesame oil, wasabi and salt & pepper to taste.
Garnish with green onions.
Enjoy!
~~~~~~~~~~~~~
Here's what you need.
Peel, cut and boil your potatoes until tender.
While they're cooking, in a small saucepan, combine evaporated milk, butter and garlic. Heat through, but don't boil.
When your potatoes are cooked drain them. Then strain the garlic out of the milk and butter. (Next time I might just squeeze a head or two of roasted garlic into the potatoes... they could have been more garlicky)
Pour hot milk & butter into potatoes and mash.
I used my hand mixer for this. I do usually like my mashed potatoes a little lumpy... but since I was trying something new, I figured I'd go creamy this time.
Add wasabi paste, sesame oil and salt and pepper to taste.
Mix well.
Garnish with green onions.
It's ready to co-star with your favorite meat!
Enjoy!
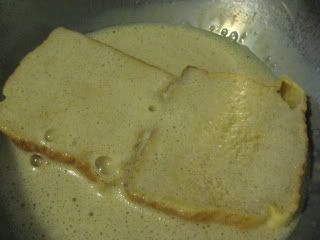
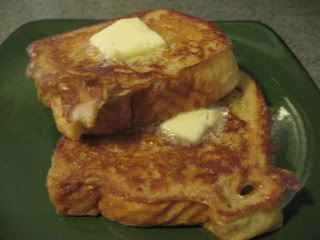
French Toast
I love to try lots of new recipes. My husband is REALLY good about trying anything and everything I make. Saturday at the grocery store we (I) were kinda planning meals as we shopped. Then I decided to make French Toast. He loves french toast. I usually prefer pancakes. And I haven't made it for a long time. So I decided to make some for him for Sunday breakfast.
I like to buy bread at the grocery store bakery and cut it myself for nice thick French toast slices. They didn't have any uncut. I was bummed and considered using cinnamon bread, but those slices are so darned thin. Then I remembered seeing Texas toast over by the deli. I've never used it before, but the slices are nice and thick, so I thought I'd give it try. Am I glad I did!!
French Toast
8 slices Texas toast
6 eggs
1/3 C evaporated milk
1 tsp vanilla
a few good shakes of cinnamon
a pinch of salt
Butter for frying
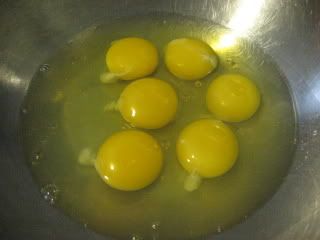
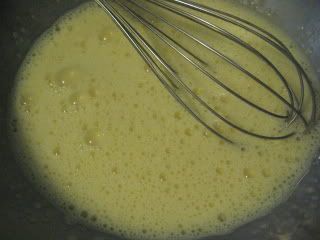
In a large bowl, whisk eggs
Whisk in milk, vanilla, cinnamon & salt
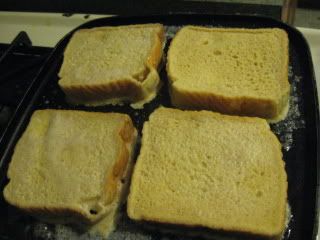
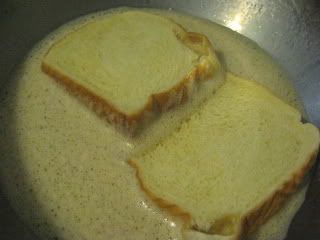
Dip bread into egg mixture and turn over. Be sure they are well coated.
Melt butter in skillet over medium heat.
When butter is melted, swirl the pan around to coat the bottom.
Add bread.
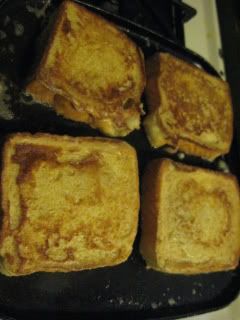
When golden on the bottom, flip to cook the other side.
Serve with butter & syrup.
YUM!!
Tuesday, November 18, 2008
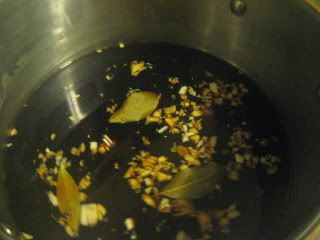
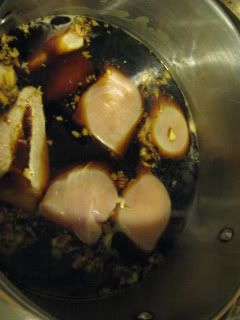
Chicken Adobo
I LOVE Chicken Adobo. I don't make it often, but it came out great last time! This is roughly how my X taught me. His mom is a great cook, but never shared her recipes. (at least not with me!)
Anyway... Tawny asked me to make this Saturday night for dinner. I had planned to make it on her birthday a few weeks ago, but that just didn't work out.
Chicken Adobo
1 1/2 C white vinegar
1 C soy sauce
5 cloves of garlic, minced
1 TBLS peppercorns
3 bay leaves
1 C water
3 - 4 lbs chicken (I use BS chicken breasts)
Combine all ingredients in a pot.
Cover and simmer until chicken is cooked through and tender.
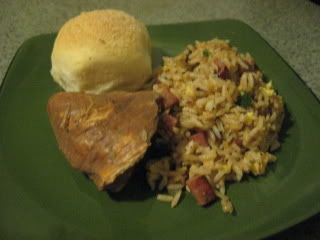
Serve over rice. (although I served it beside fried rice last time!)
If you use chicken parts with skin (and you totally can) when chicken is cooked, remove from pan and pat dry. Brown up the skin in a skillet with some oil. Reduced the sauce and serve over chicken.
My X-MIL always just served it like I made it, but I might try 'parts' another time!
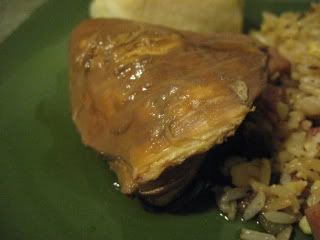
It's doesn't look very pretty... but it's soooo flavorful!
Pan de Sal
Ok... I tried to make this a few weeks ago for Tawny's birthday... but ended up with a gooey mess. I don't know what I did wrong... well... I guess the first thing was not paying attention.
Anyway... I asked for dinner suggestions on Saturday and Tawny asked for the Chicken Adobo I didn't make on her birthday. Sure I can totally do that. I told her I'd make Pan de Sal too. And this time it came out great!
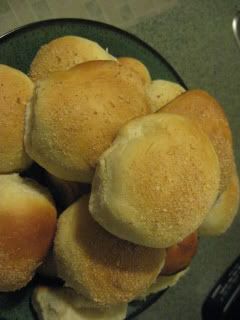
Pan de Sal is a Filipino sweet bread roll.
Pan de Sal (printable recipe)
1/2 cup water
1/4 cup evaporated milk
1/2 cup milk
1 egg
1/2 cup sugar
3/4 teaspoon salt
5 tablespoons softened butter
1 tablespoon oil
4 cups flour
3 teaspoons yeast
bread crumbs
Place all ingredients except bread crumbs into a bread machine in the order recommended by the manufacturer.
Select the Dough cycle, and press start.
When the cycle has ended, remove the dough from the machine, and form into 2 inch balls.
Dip each dough ball in bread crumbs.
Place the rolls on a parchment lined, baking sheet crumb-side up.
Cover loosely with a cloth or plastic, and let rise until doubled in size, about 30 minutes.
Preheat the oven to 350F.
Bake rolls for 8 minutes, or until golden brown on the top and bottom.
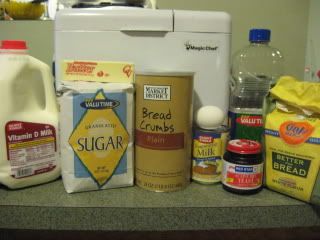
Here's what you need
Place all ingredients except bread crumbs into a bread machine in the order recommended by the manufacturer.
Select the Dough cycle, and press start.
When the dough cycle has ended, pull the dough out. I just plop it onto one of my parchment paper lined baking sheets.
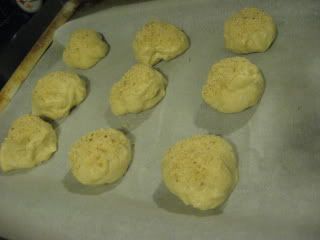
Roll into two inch balls and dip into bread crumbs.
My dough balls are more blob shaped than ball shaped.
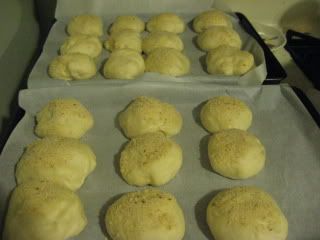
Cover and let rise for about 30 minutes or until about doubled in size.
Preheat oven to 350F.
Bake 8 minutes or until golden.
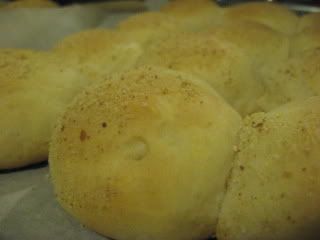
These are great dinner rolls... they are also really good with jam or cheese.
Anyway... I asked for dinner suggestions on Saturday and Tawny asked for the Chicken Adobo I didn't make on her birthday. Sure I can totally do that. I told her I'd make Pan de Sal too. And this time it came out great!
Pan de Sal is a Filipino sweet bread roll.
Pan de Sal (printable recipe)
1/2 cup water
1/4 cup evaporated milk
1/2 cup milk
1 egg
1/2 cup sugar
3/4 teaspoon salt
5 tablespoons softened butter
1 tablespoon oil
4 cups flour
3 teaspoons yeast
bread crumbs
Place all ingredients except bread crumbs into a bread machine in the order recommended by the manufacturer.
Select the Dough cycle, and press start.
When the cycle has ended, remove the dough from the machine, and form into 2 inch balls.
Dip each dough ball in bread crumbs.
Place the rolls on a parchment lined, baking sheet crumb-side up.
Cover loosely with a cloth or plastic, and let rise until doubled in size, about 30 minutes.
Preheat the oven to 350F.
Bake rolls for 8 minutes, or until golden brown on the top and bottom.
~~~~~~~~~~~~~
Here's what you need
Place all ingredients except bread crumbs into a bread machine in the order recommended by the manufacturer.
Select the Dough cycle, and press start.
When the dough cycle has ended, pull the dough out. I just plop it onto one of my parchment paper lined baking sheets.
Roll into two inch balls and dip into bread crumbs.
My dough balls are more blob shaped than ball shaped.
Cover and let rise for about 30 minutes or until about doubled in size.
Preheat oven to 350F.
Bake 8 minutes or until golden.
These are great dinner rolls... they are also really good with jam or cheese.
Friday, November 14, 2008
Green Pea Soup w/Cheddar Scallion Panini
This recipe came in a my Everyday Food Magazine. I don't recall the month, but I found the recipe online at MarthaStewart.com.
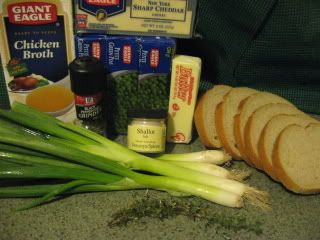
The picture made me want to make it right away. Well... it didn't happen right way. I did make the sandwiches pretty soon after the magazine came and LOVED them. I was really looking forward to making the soup with the sandwiches. Last night was the night. I added some Thyme and instead of plain salt, I used Shallot Salt.
* 3 tablespoons butter
* 4 scallions, white and green parts separated and thinly sliced
* 3 boxes (10 ounces each) frozen peas
* 2 C reduced-sodium chicken broth
* 1 1/2 cups shredded sharp white cheddar (6 ounces)
* 6 slices rye sandwich bread
* Shallot salt and ground pepper
* 1 tablespoon fresh lemon juice
* thyme, a few fresh sprigs
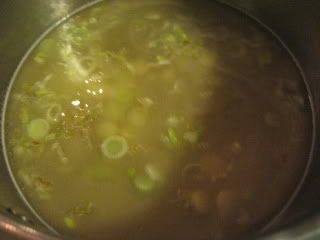
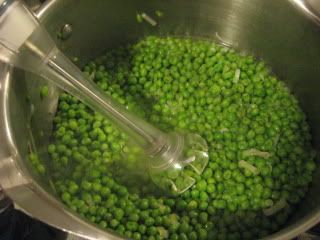
I sliced the white parts of the scallions and sauted them in some of the butter in a soup pot.
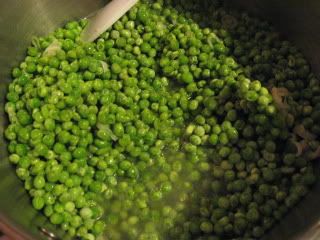
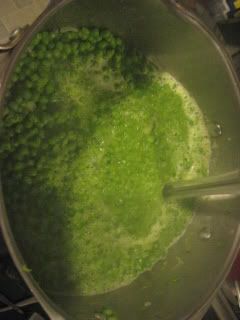
When the scallions are tender, add broth, peas and thyme.
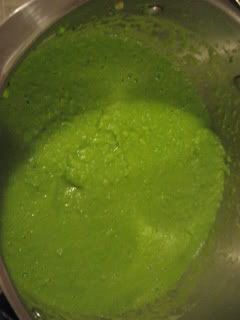
When peas are tender, blend with stick blender until smooth. And season with lemon juice, shallot salt & pepper.
Mine was quite thick... I noticed after that in the instruction portion of the recipe, it also called for 3 cups of water. That would make it much thinner, but not any tastier. I didn't mind the thick texture.... but I found this soup to be very bland. But Jon & Tawny liked it. So who knows... you might too!!
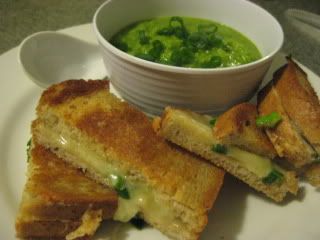
The sandwiches are wicked easy & wicked good!!
Toss the shredded cheese & green scallions together.
I buttered one side of each slice of bread, because that's the way I like to do it.
Put shredded cheddar mixture on unbuttered side of bread and top with unbuttered side of another slice.
Then just grill them until golden.
Serve with soup!
These sandwiches were so simple but sooooo tasty!! I will be making these often!